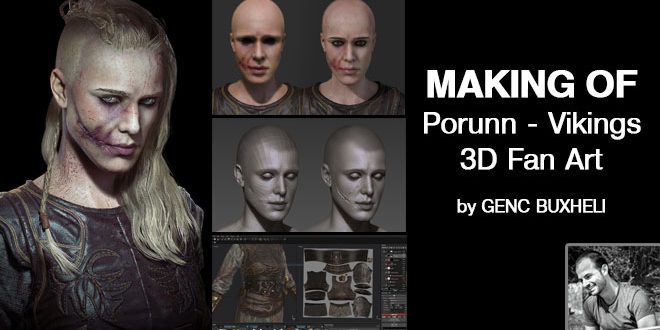
Making of Porunn – Vikings 3D Fan Art by GENC BUXHELI
Making of Porunn
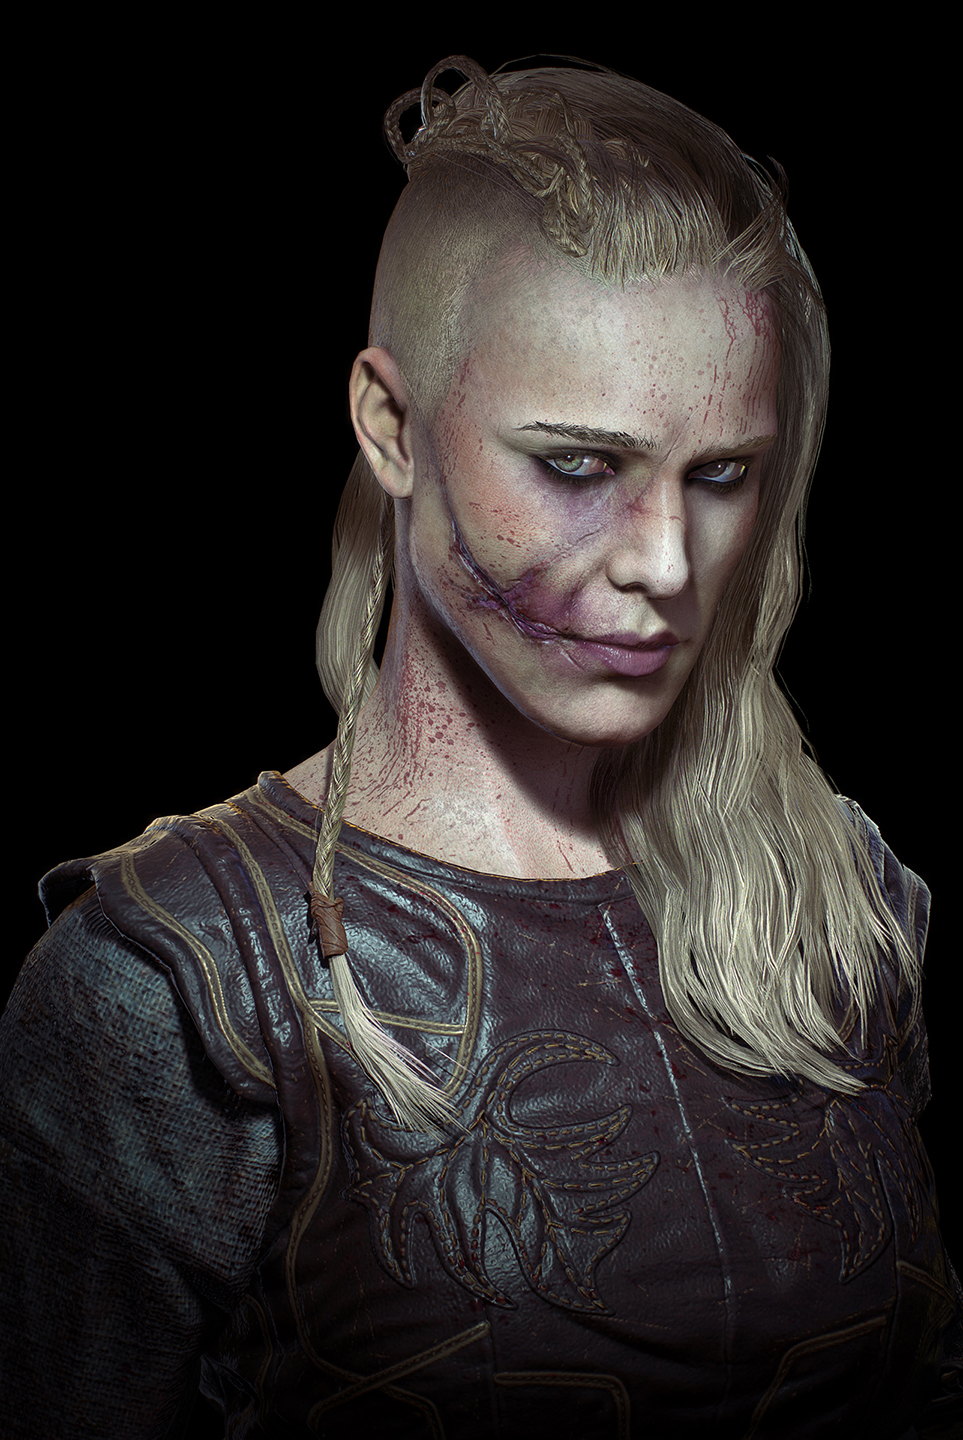
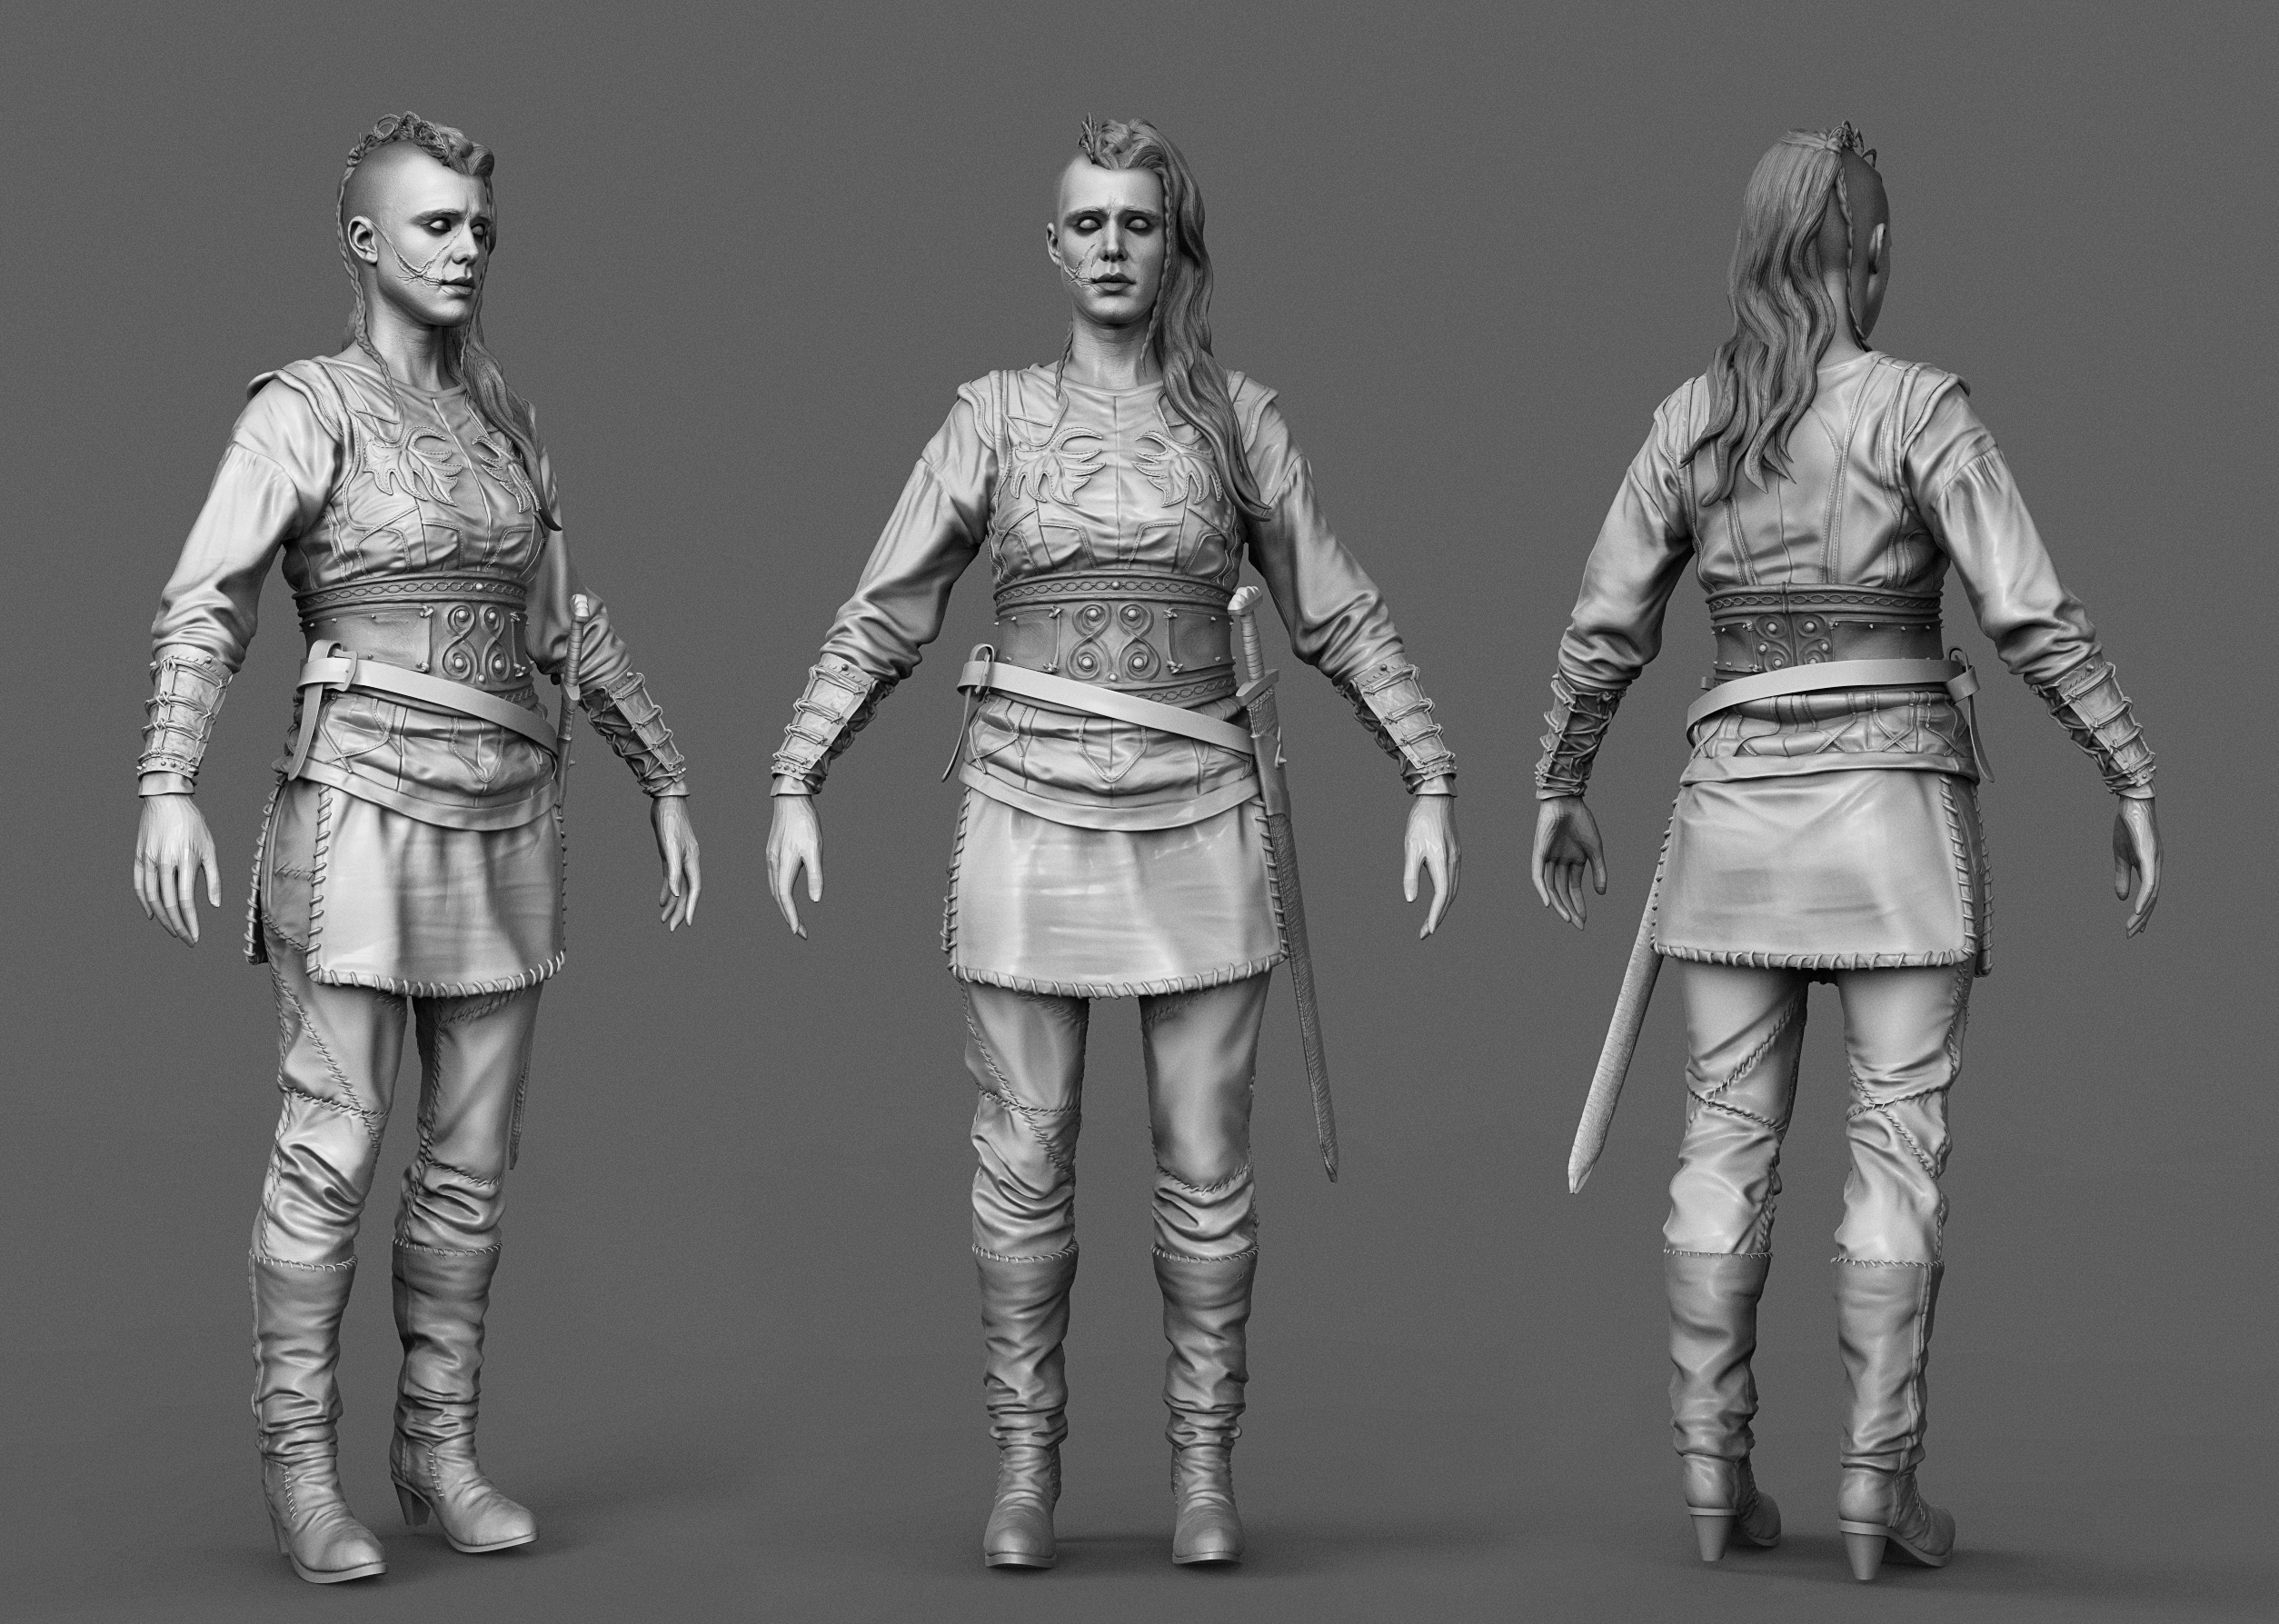
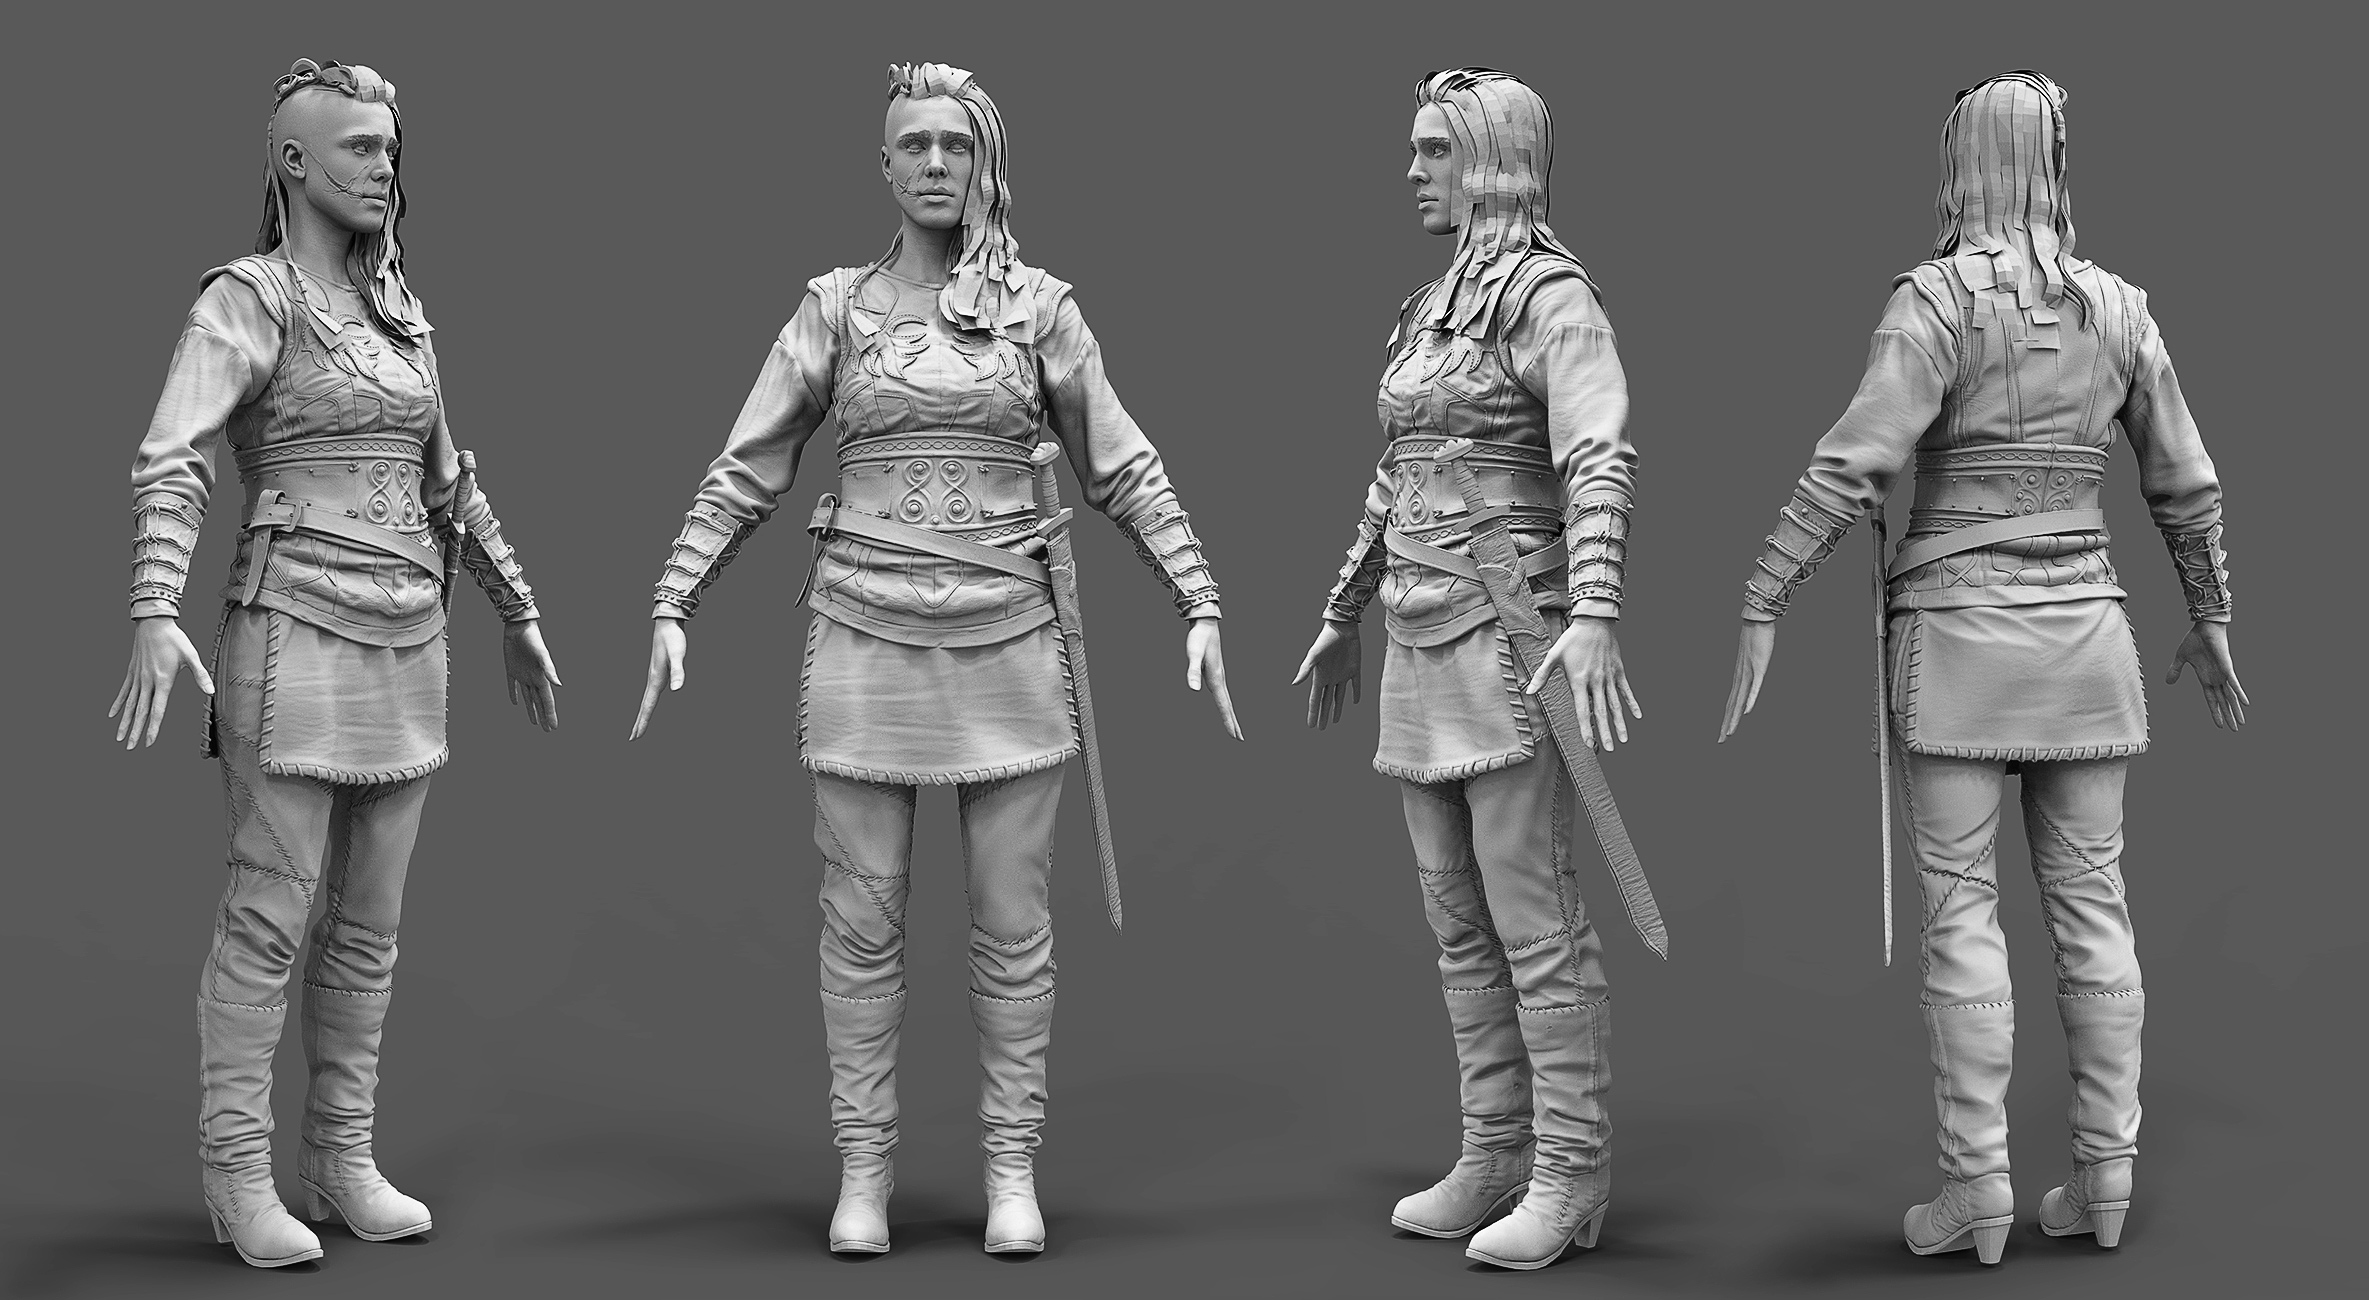
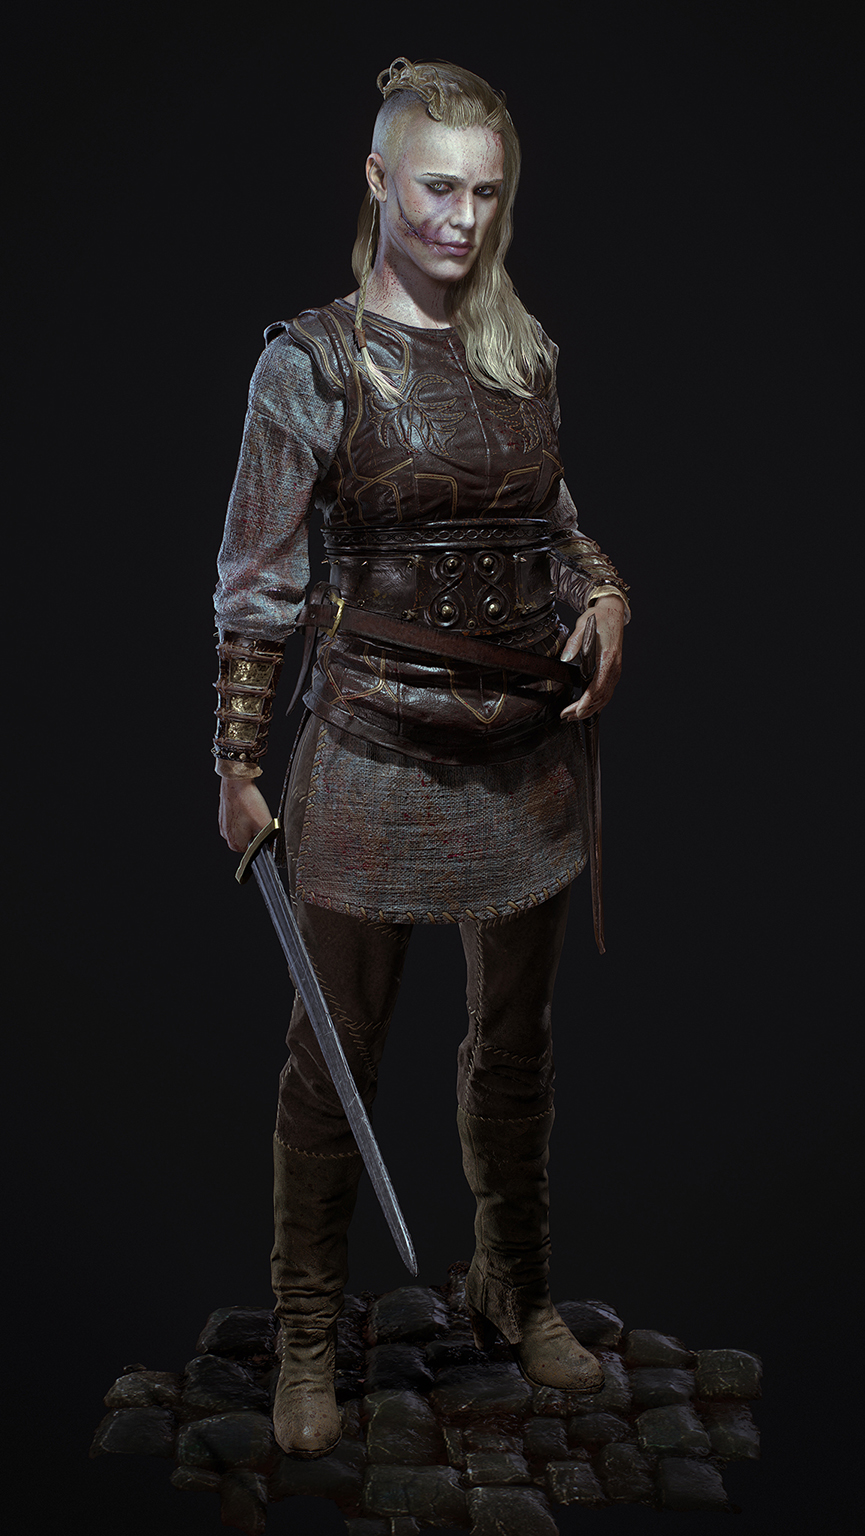
I decided to work on Porunn because I really liked the clothes design and hair style. I needed more current gen Characters to add to my portfolio while also trying to learn new things and improve my workflow. Porunn was the right choice to learn.
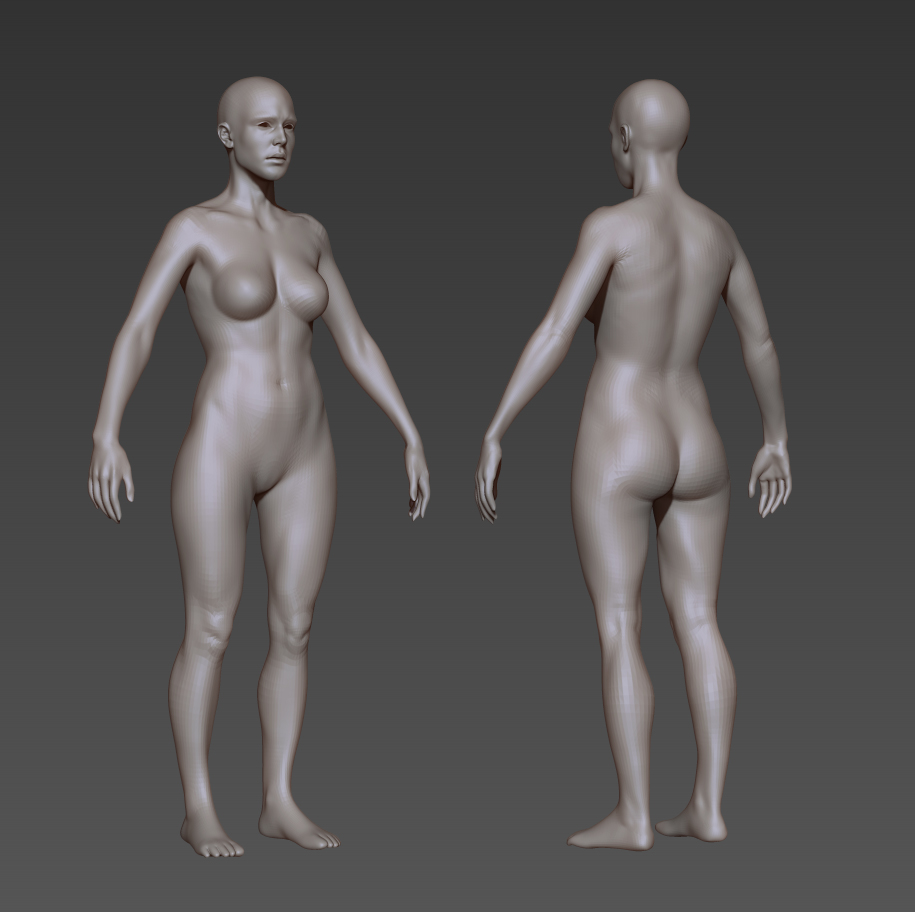
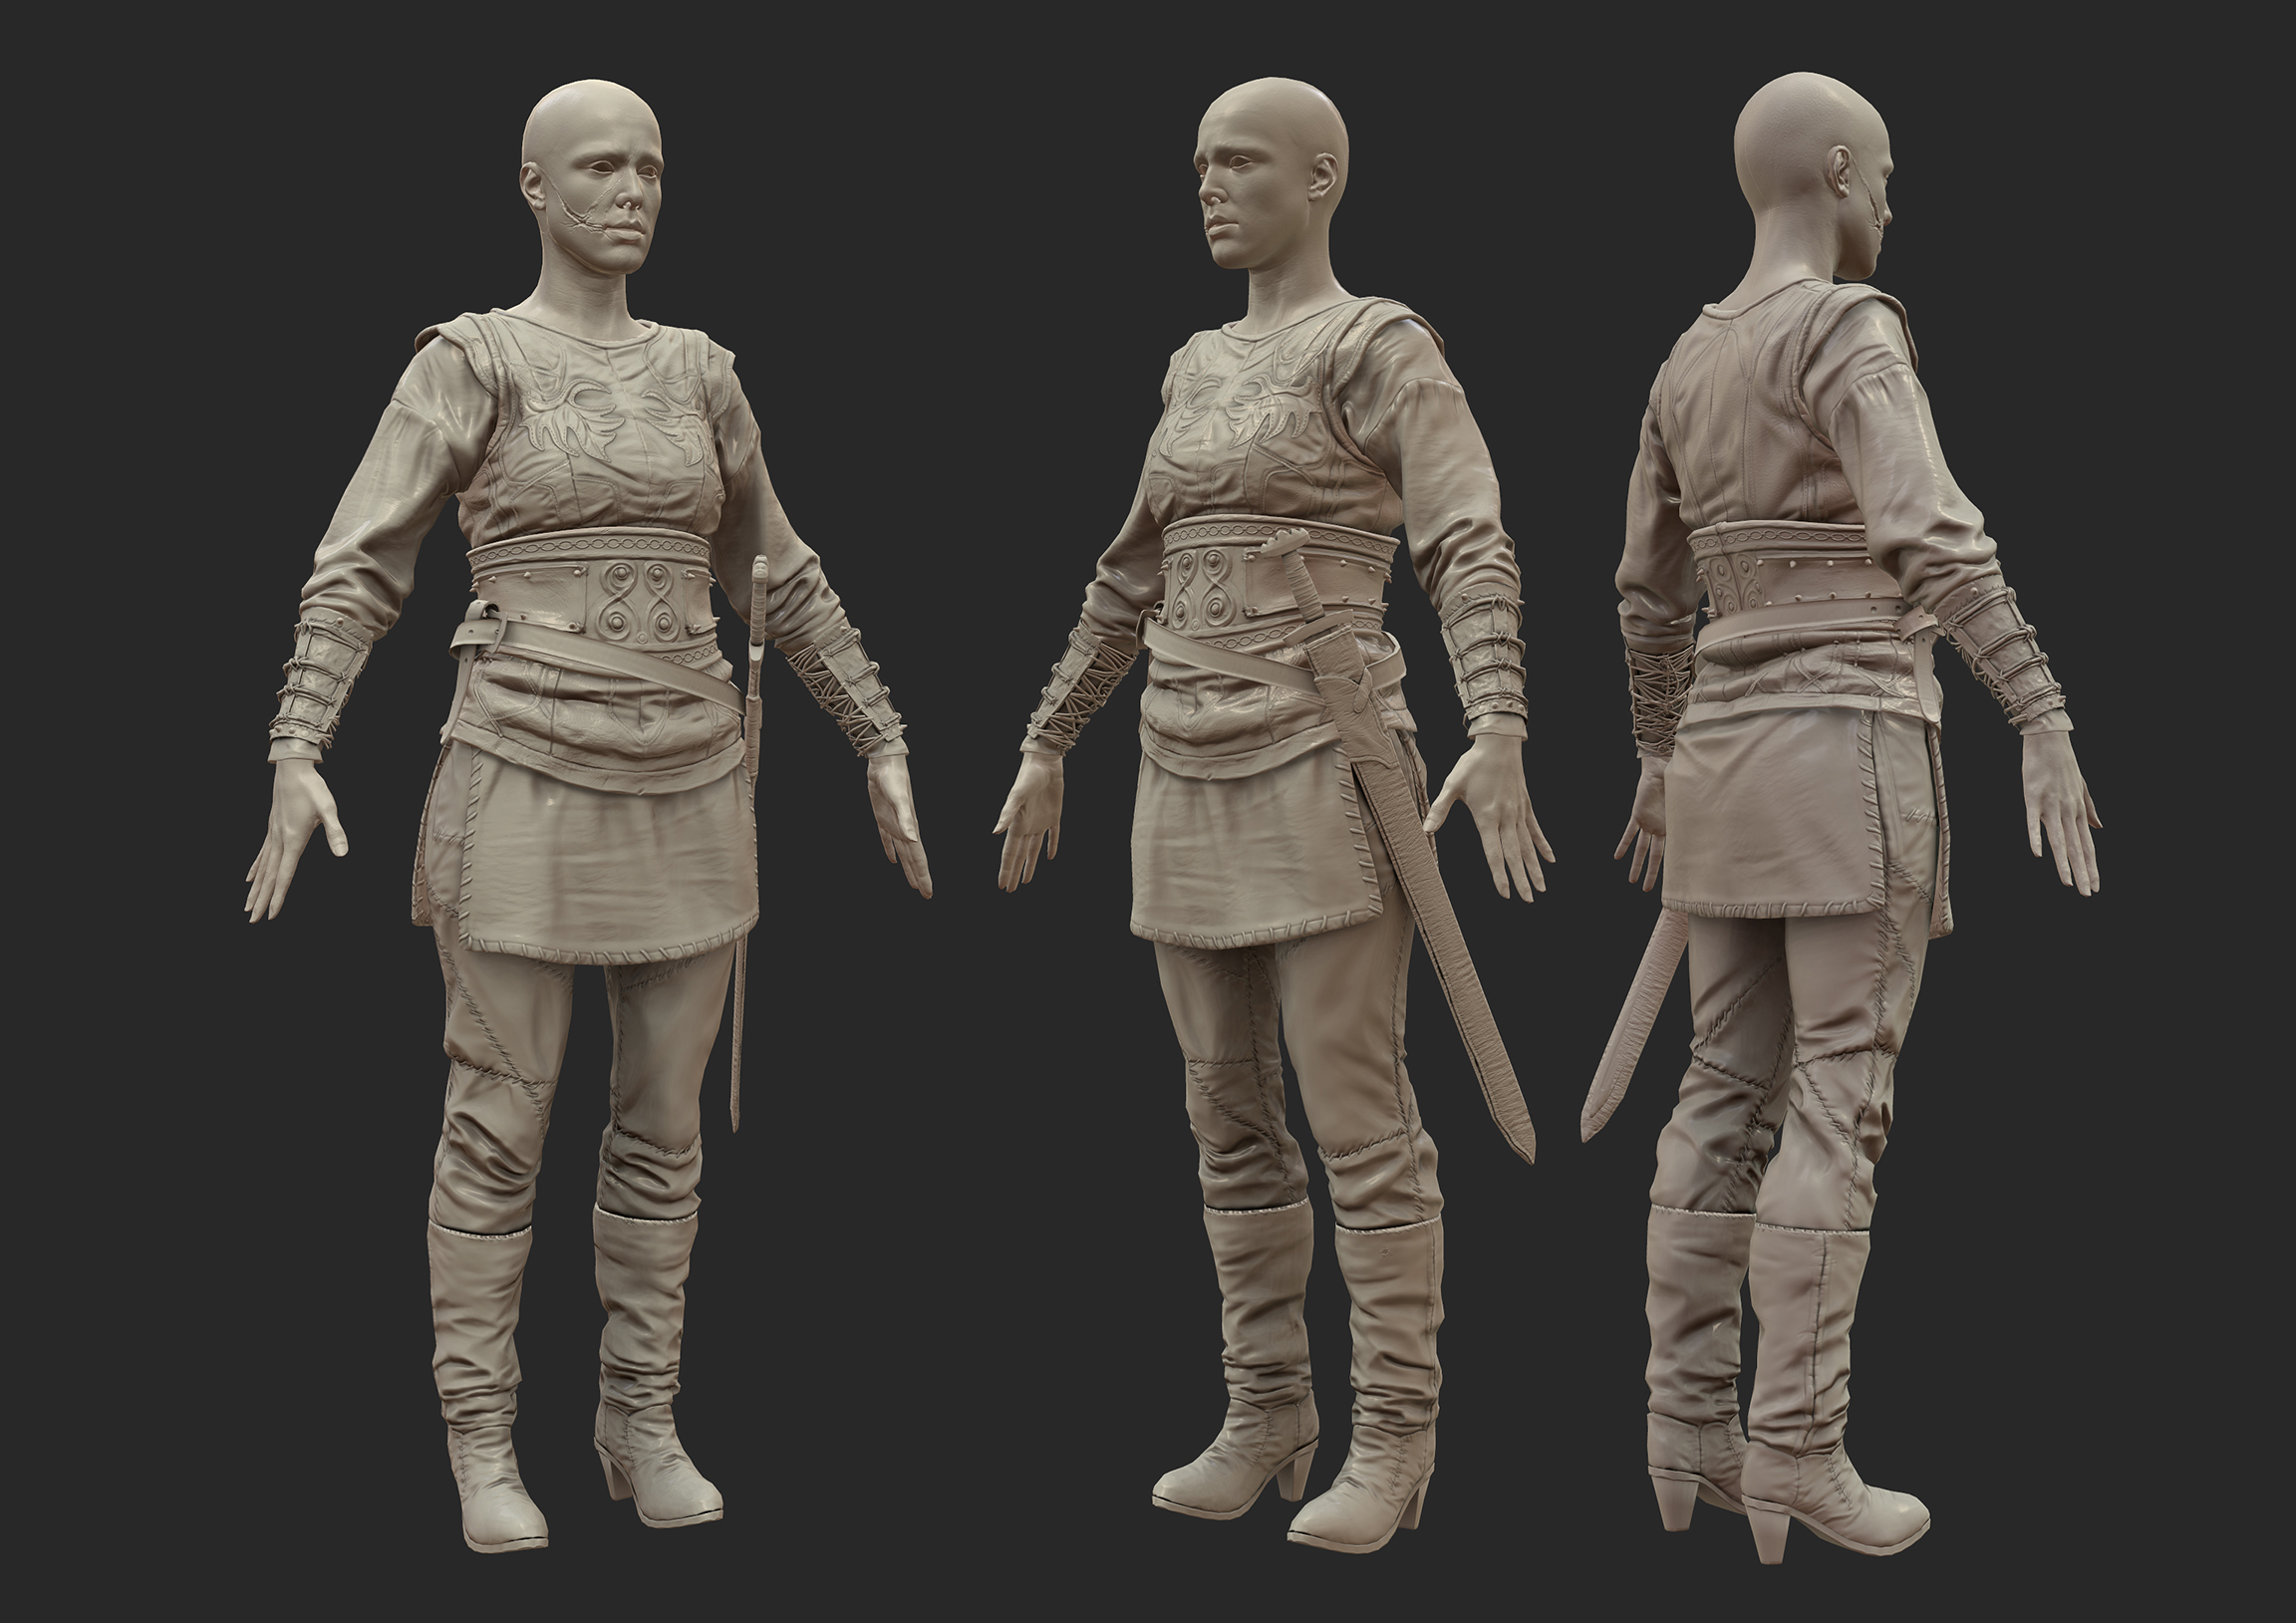
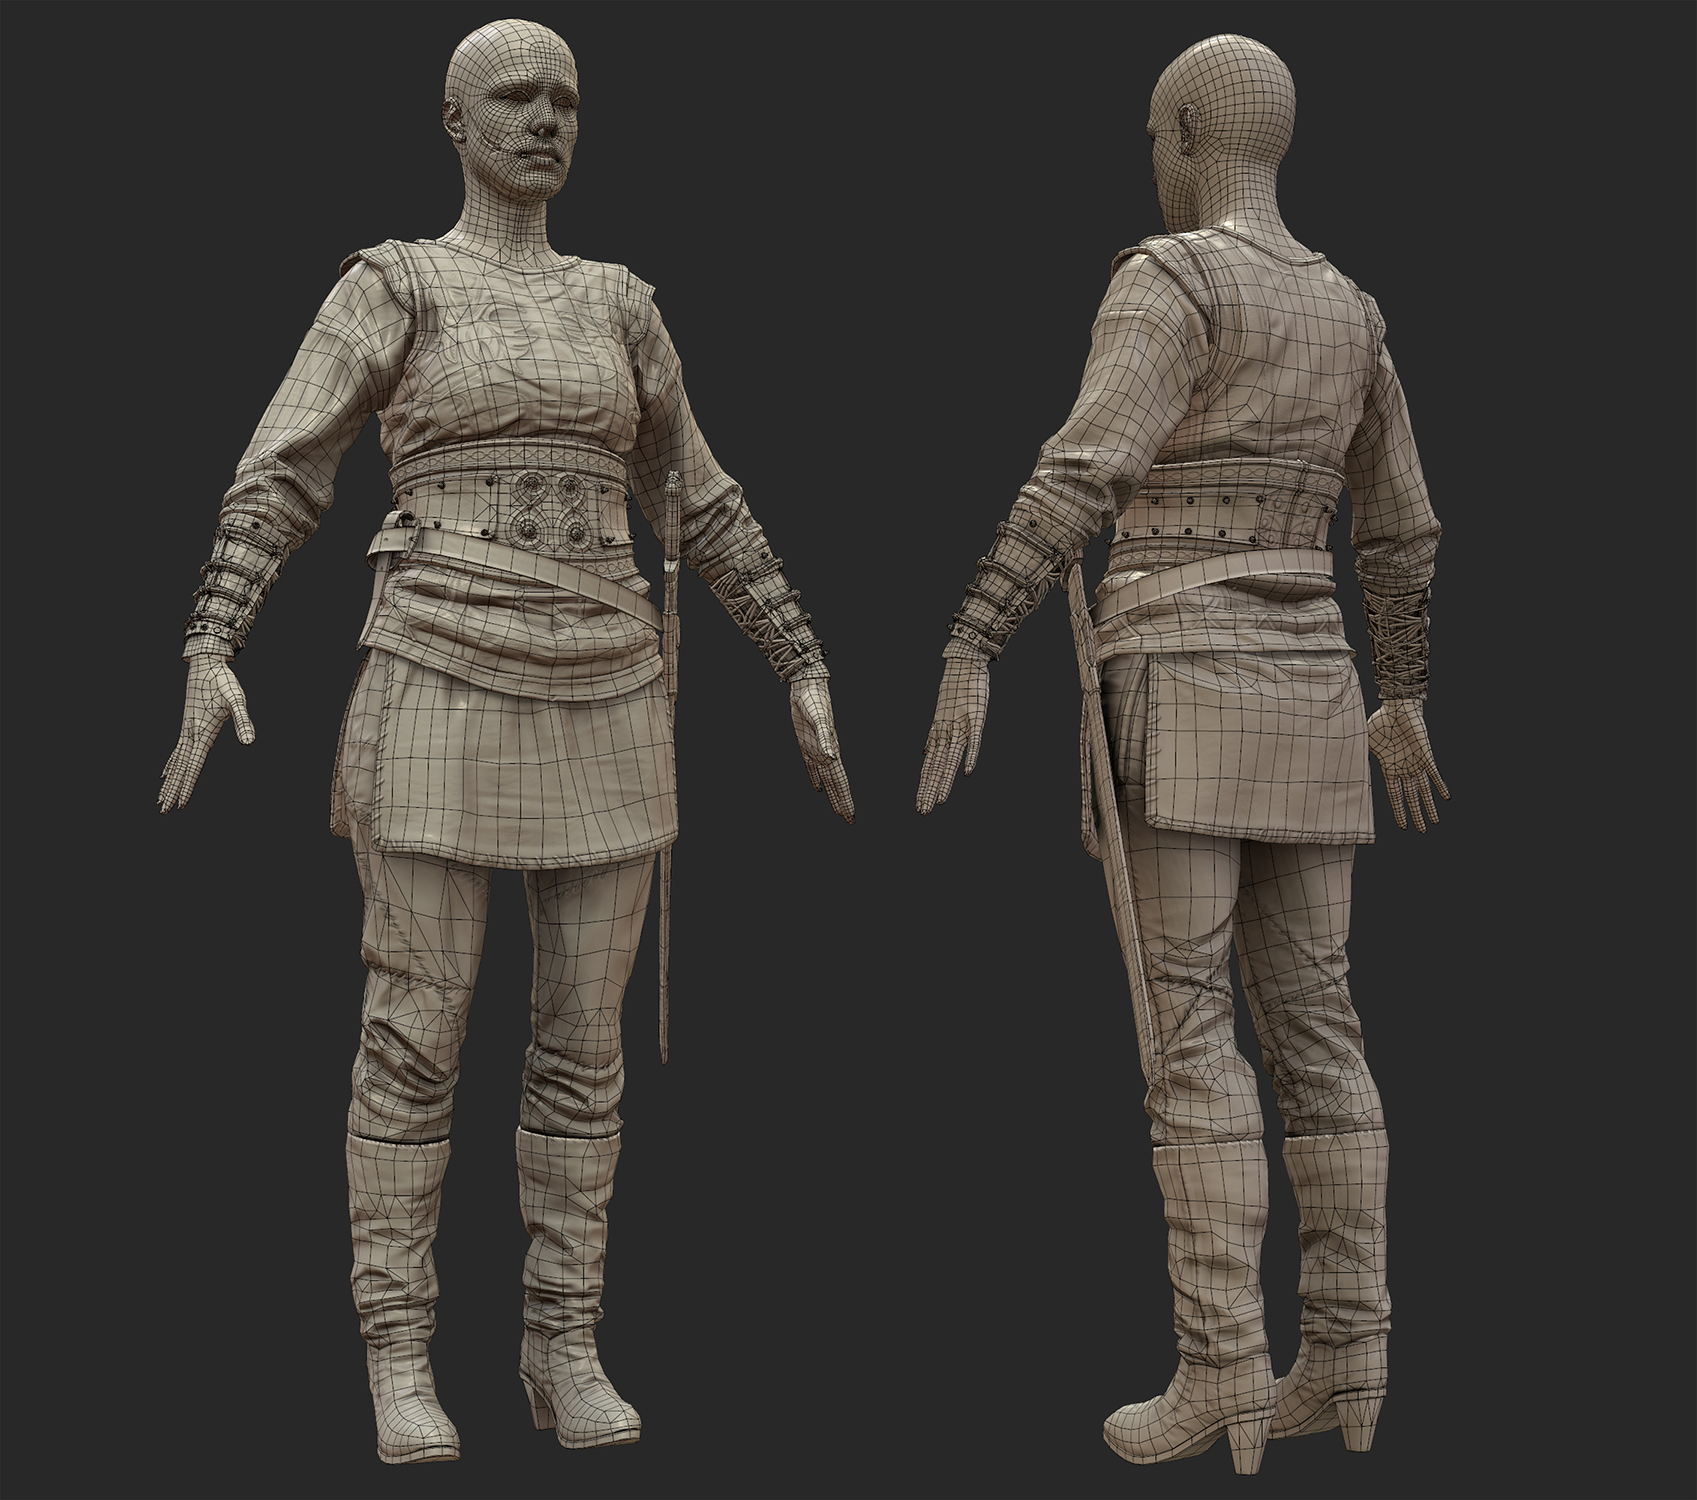
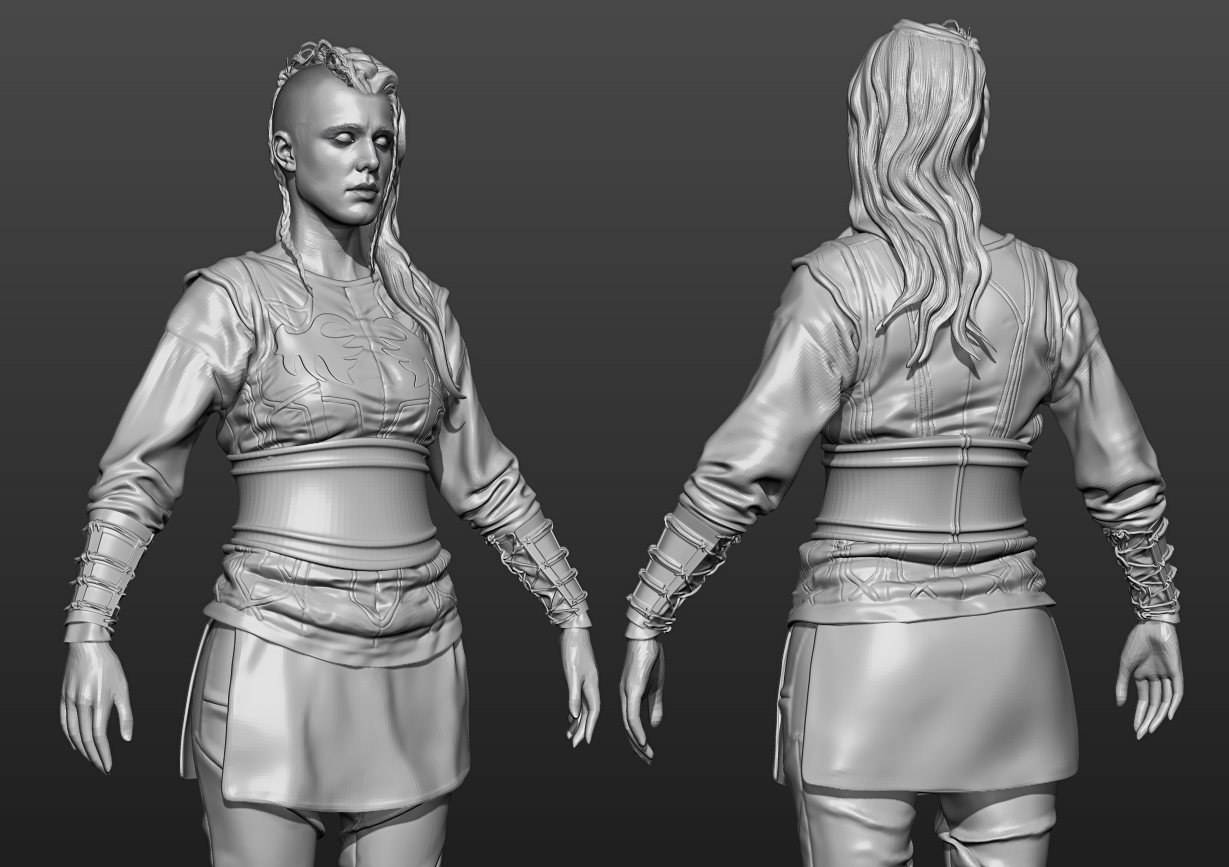
Starting off a base mesh, I usually try to get the anatomy correct. I don’t spend much time detailing the parts that will be covered by clothing. I then detach the head into a separate subtool to be able to sculpt it separately without limiting myself on subdivision levels.
To get the likeness to match, I usually get a lot of reference Photos and over impose the model over them using the see through slider. A good tip is to save some custom views into the ZappLink proprieties and make sure that FOV matches the photos!
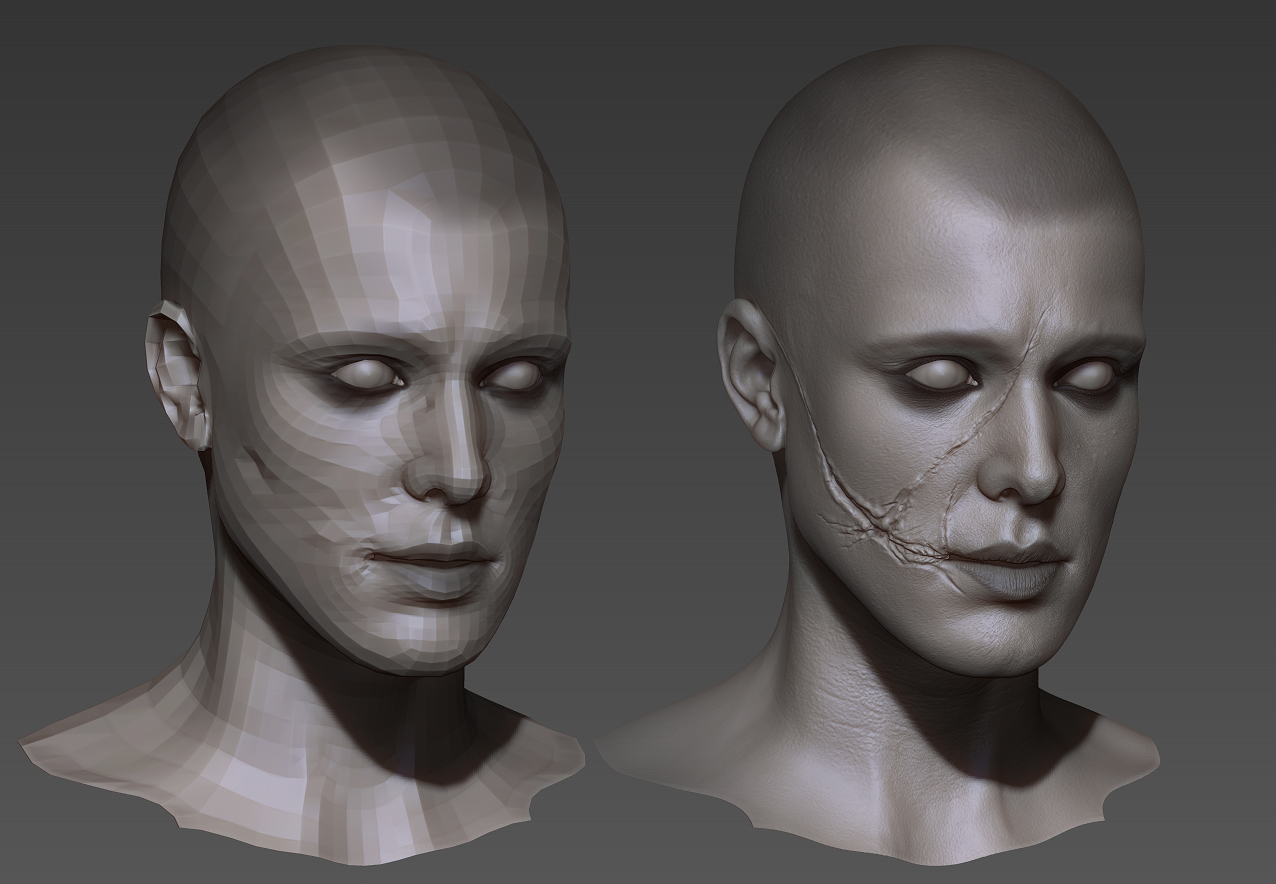
When the facial shapes are all in place, I UV map it then bring it to Mari so that I can project the skin displacement maps from TexturingXYZ. I then use Zbrush to apply these displacements into separate layers for refining at a later stage.
Hair was modeled in parts in Zbrush and baked into poly planes. I used fibermesh to create different hair locks, then baked normals, occlusion and opacity mask in 3ds Max. Each hair plane was then placed manually over the head. Texturing was mostly done in Photoshop.
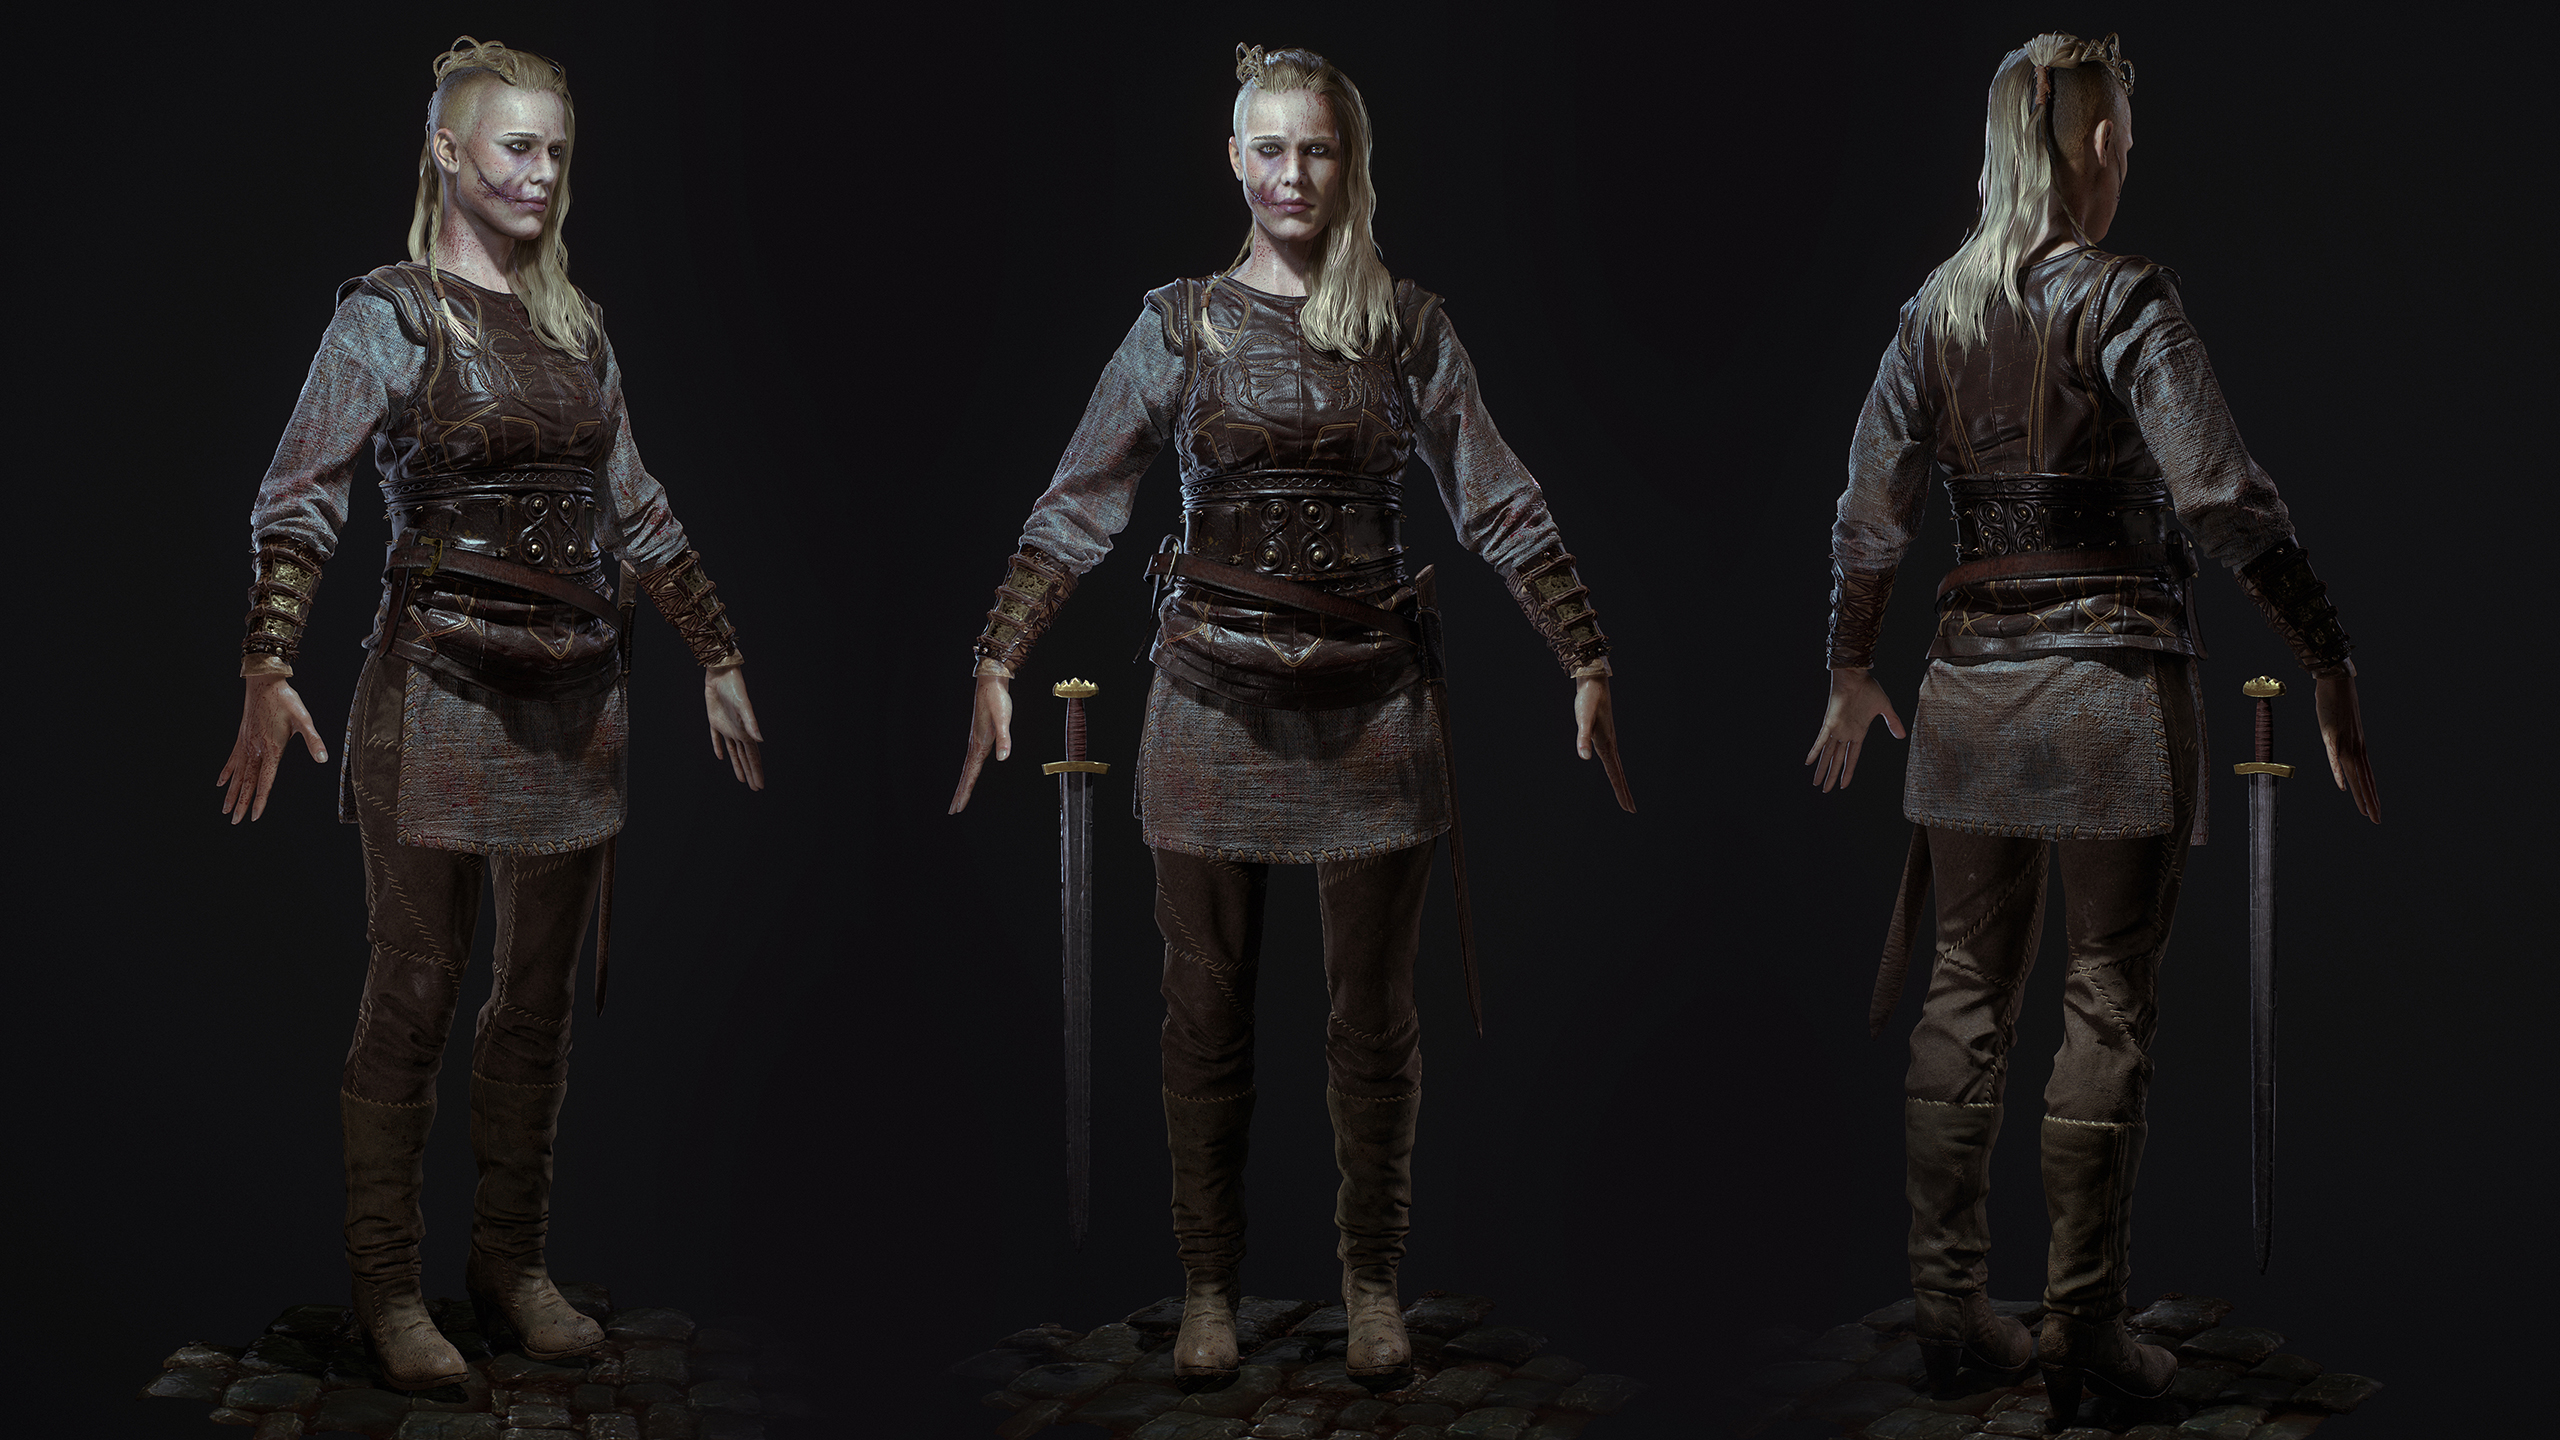
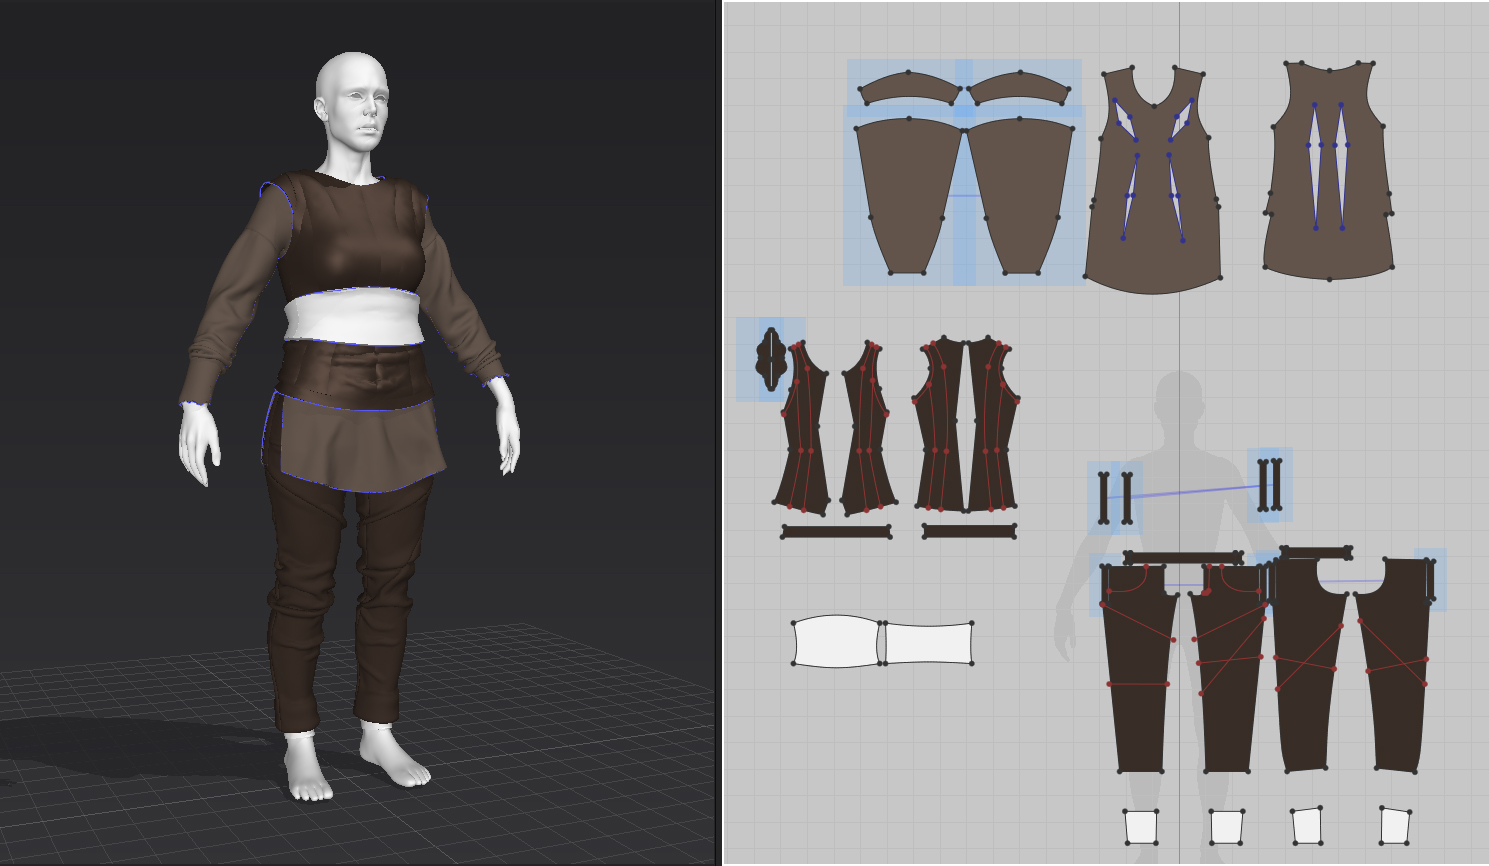
Lately I started implementing Marvelous Designer into my workflow. I really like to have a base for the clothes and then detail that in Zbrush. I first worked on each cloth separately, Simulated each of them, then brought them all in the same project. I freeze the clothes that are not intersecting, then simulate again the ones that are. In this case, just the shirt and Jacket. I then export all of them in Zbrush to retopologize and detail. For the small details like stitches, I usually prefer to use custom made Insert Meshes and use Curve to add them to my model. I will keep them a separate tool for later use.
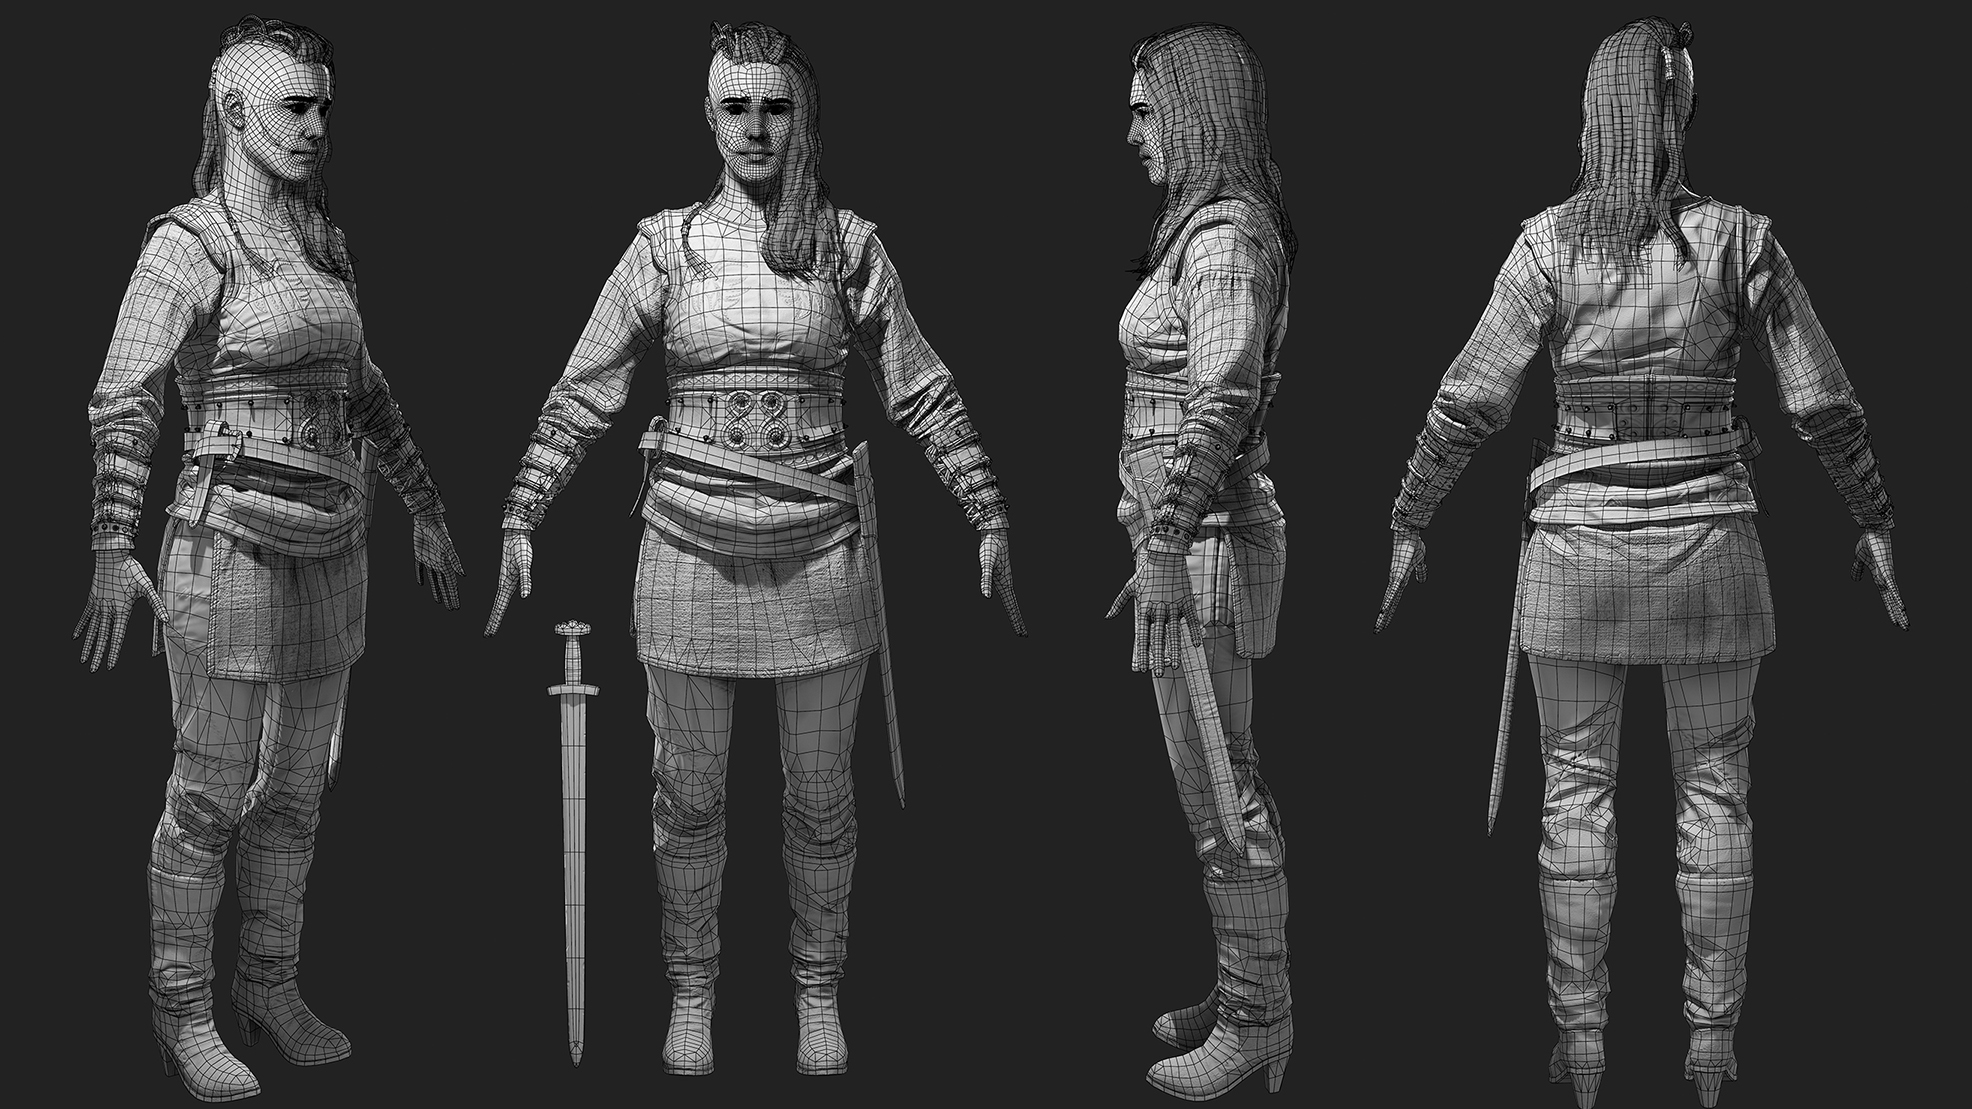
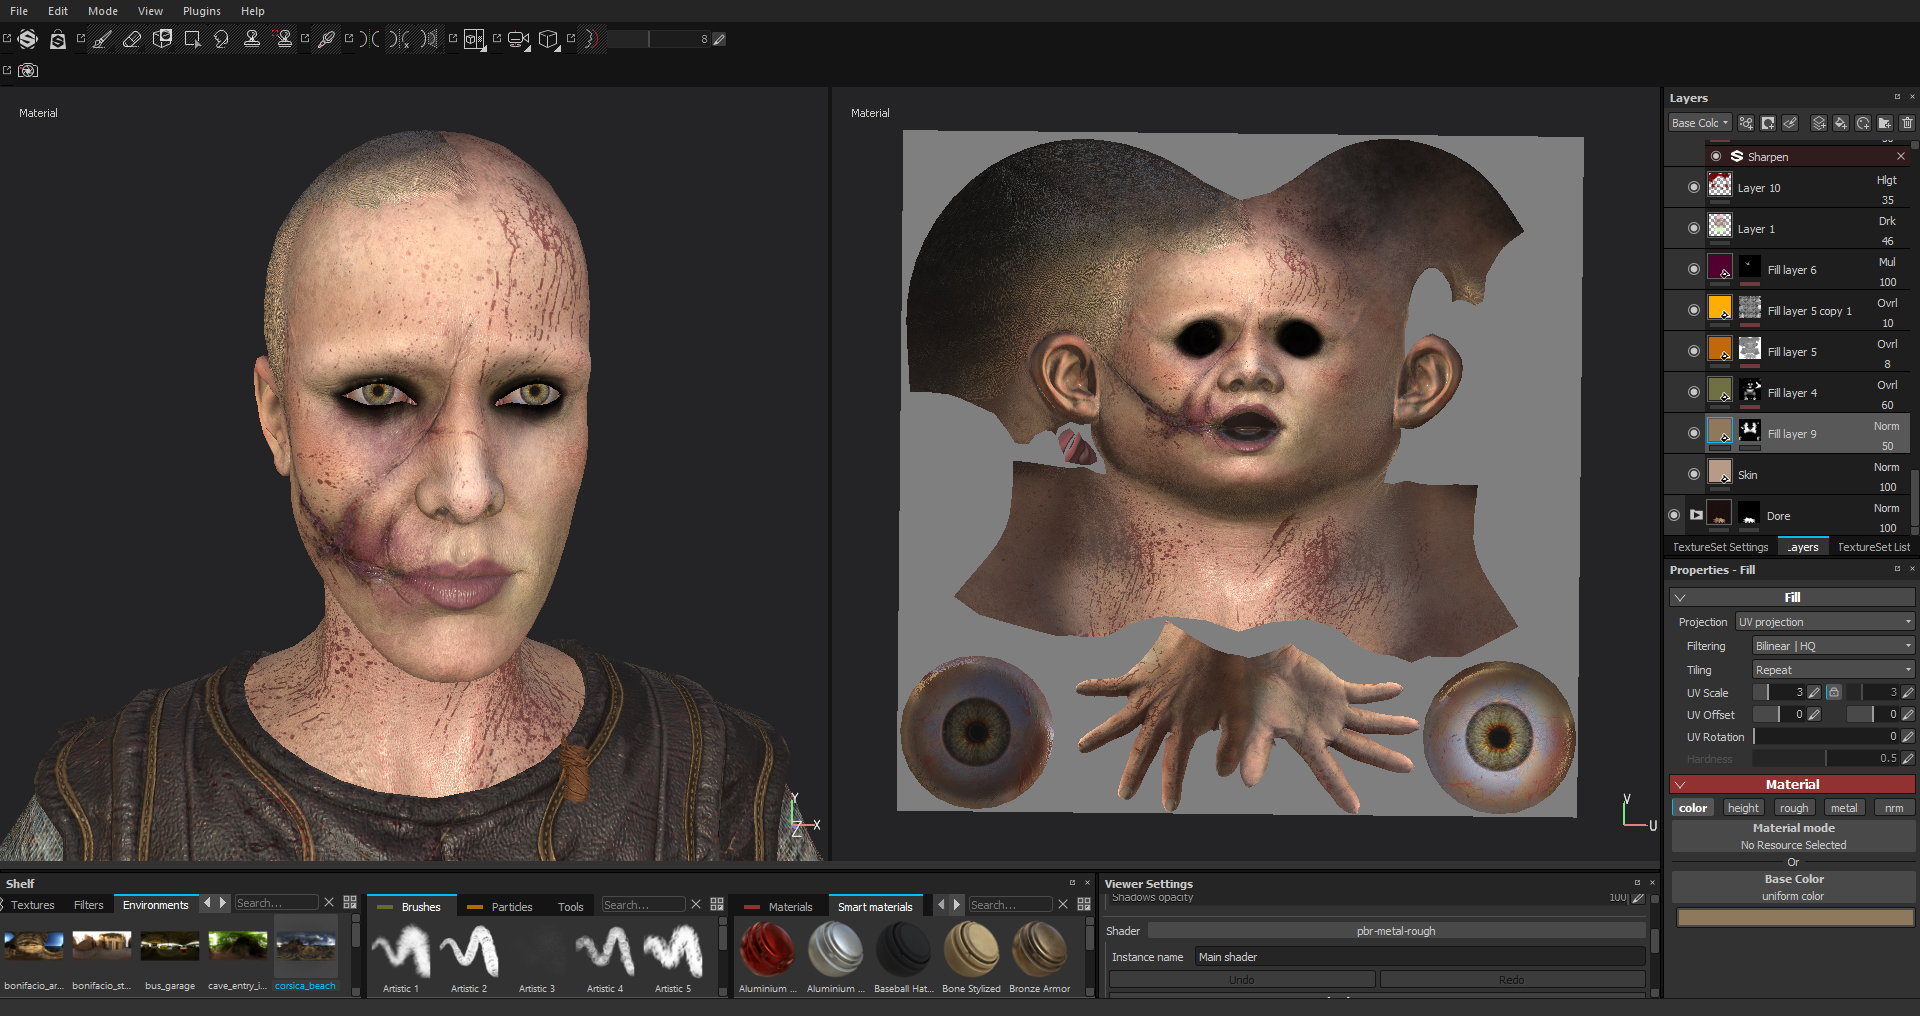
The Low poly mesh has been created in Topogun. I UV map each part into different uv groups in Max and export as a single Obj mesh. This character for example has 4 groups divided into Head, Hair, Upper Body, Lower Body. I then generate the different maps (Occlusion, ID, Normal, Curvature etc) required to have total control of the texturing process right from Substance Painter.
The first thing I do in Substance, before starting texturing, is to make sure each material has it’s own folder in the Substance Layers panel.
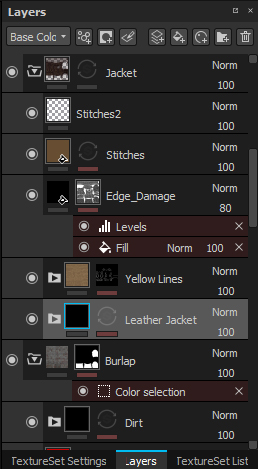
For the face, I created a fill layer with a skin color and a basic roughness value (I kept it rather high), then I created another fill layer on top of that with only the roughness channel activated and used the baked cavity map as a mask for this layer. I would then add a paint layer in the mask and paint to control this Fill Layer opacity. This was to make some parts of the face more shiny looking. At any time I could go back and move the roughness slider to other values if I wanted to.
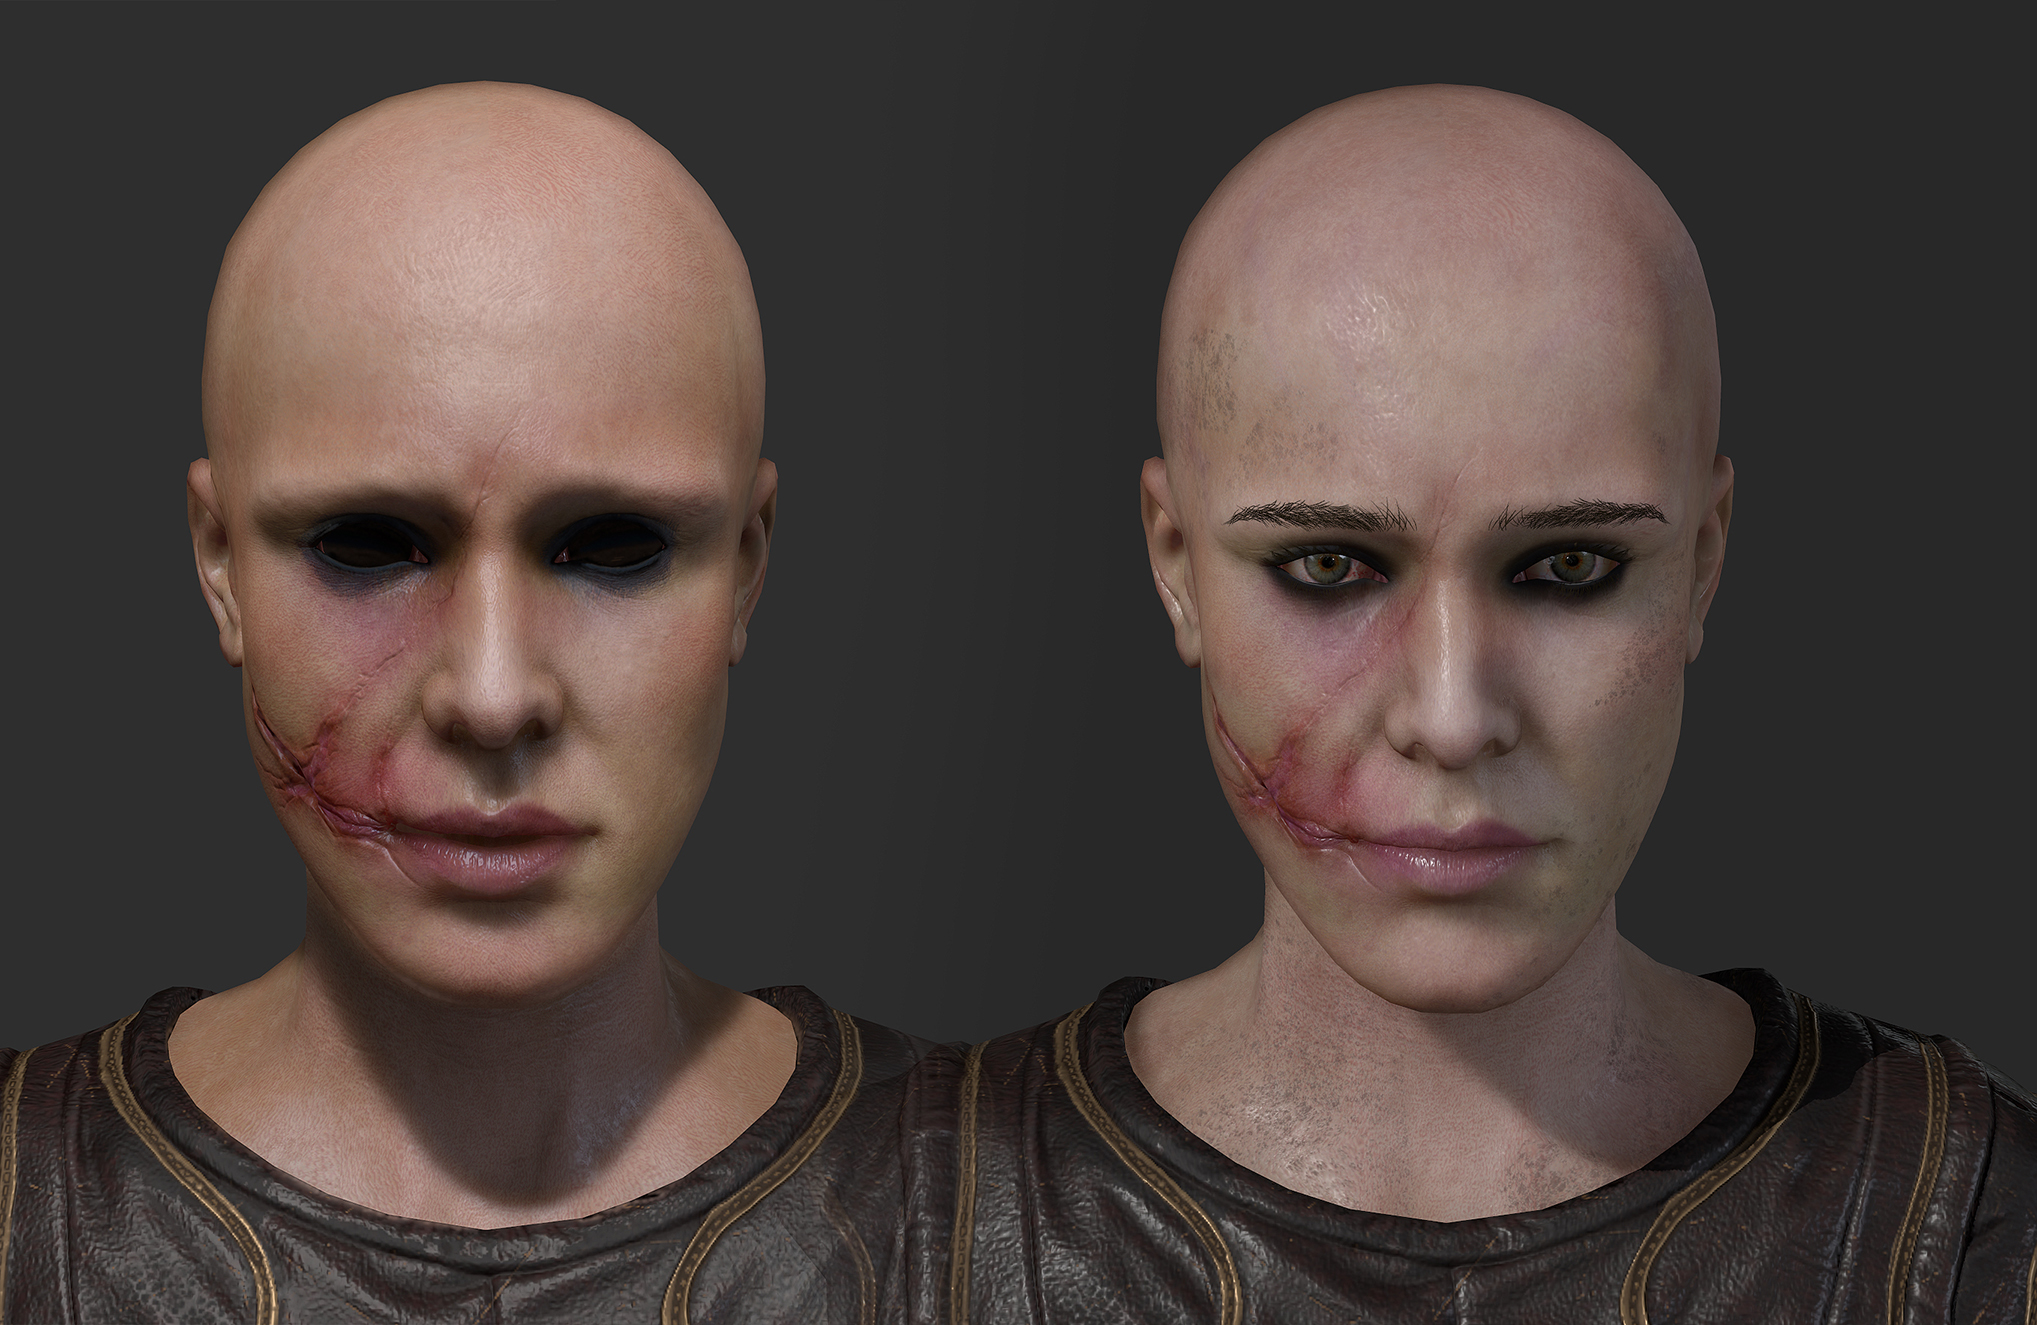
At this point I added a simple layer and painted over some color information (Mostly in the UV window) that would be then overlaid to the skin color underneath. If you see carefully, there are a lot of color combinations that makes skin alive. For this purpose I decided to yet again add more fill layers with specific colors and control those using masks with fill layer added to them.
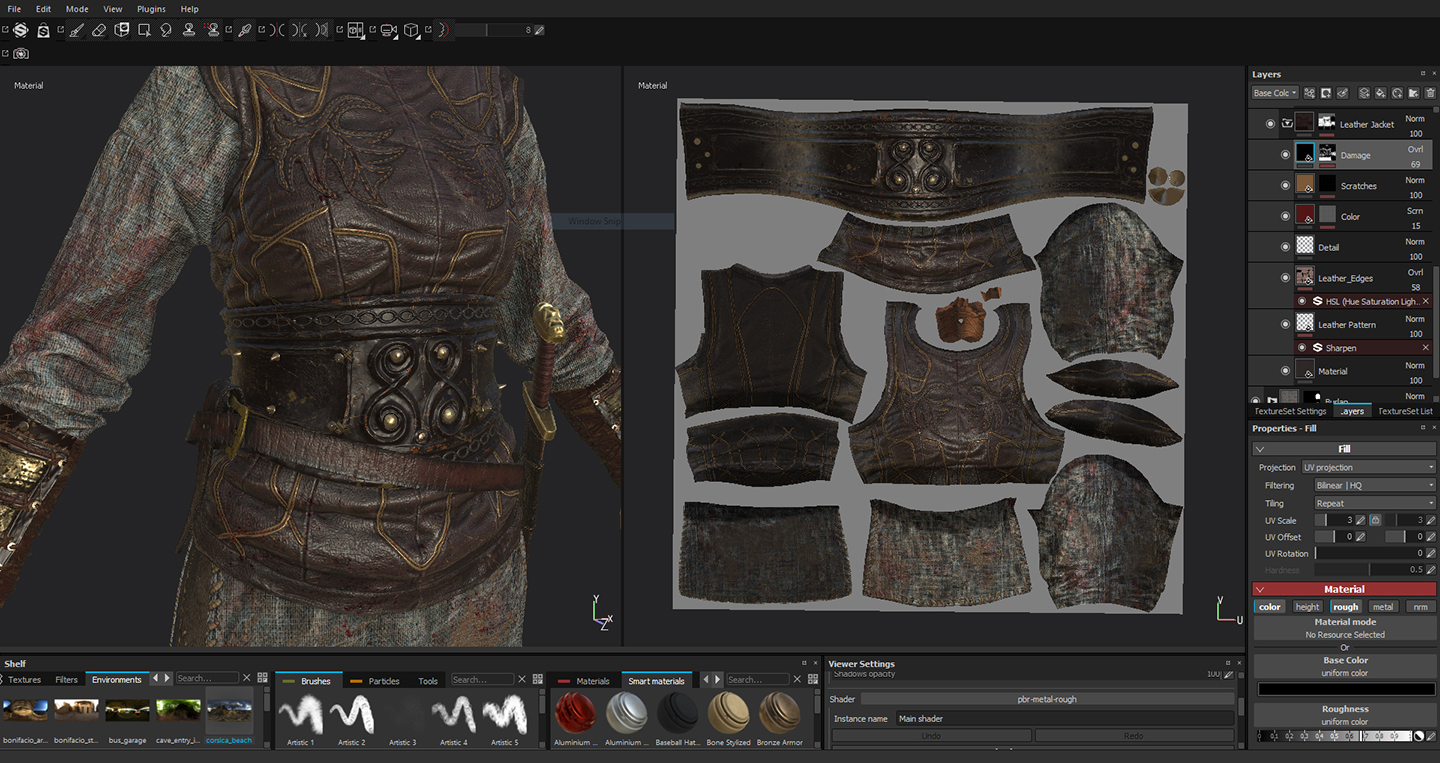
For the clothes, I started by using smart materials whenever possible. Leather parts had a layer of only height channel where I could tile the leather pattern to get a correct scale related to the rest of the materials. I then added a damage layer with very high roughness values and darker tone. Scratches were added as a single fill layer, with color, roughness and height channel activated, then controlled through masks.
The Burlap texture had a different approach. I first took a tileable photo of the burlap cloth, made it into an height map and used that as a pattern. Then I overlaid different variations of colors with horizontal lines used as masks to match the original look it has on the TV Show. I then added dirt, mud and sweat as different layers.
Metal was quickly textured by using Smart Materials already available in the software. They were slightly edited to get the look that I wanted.
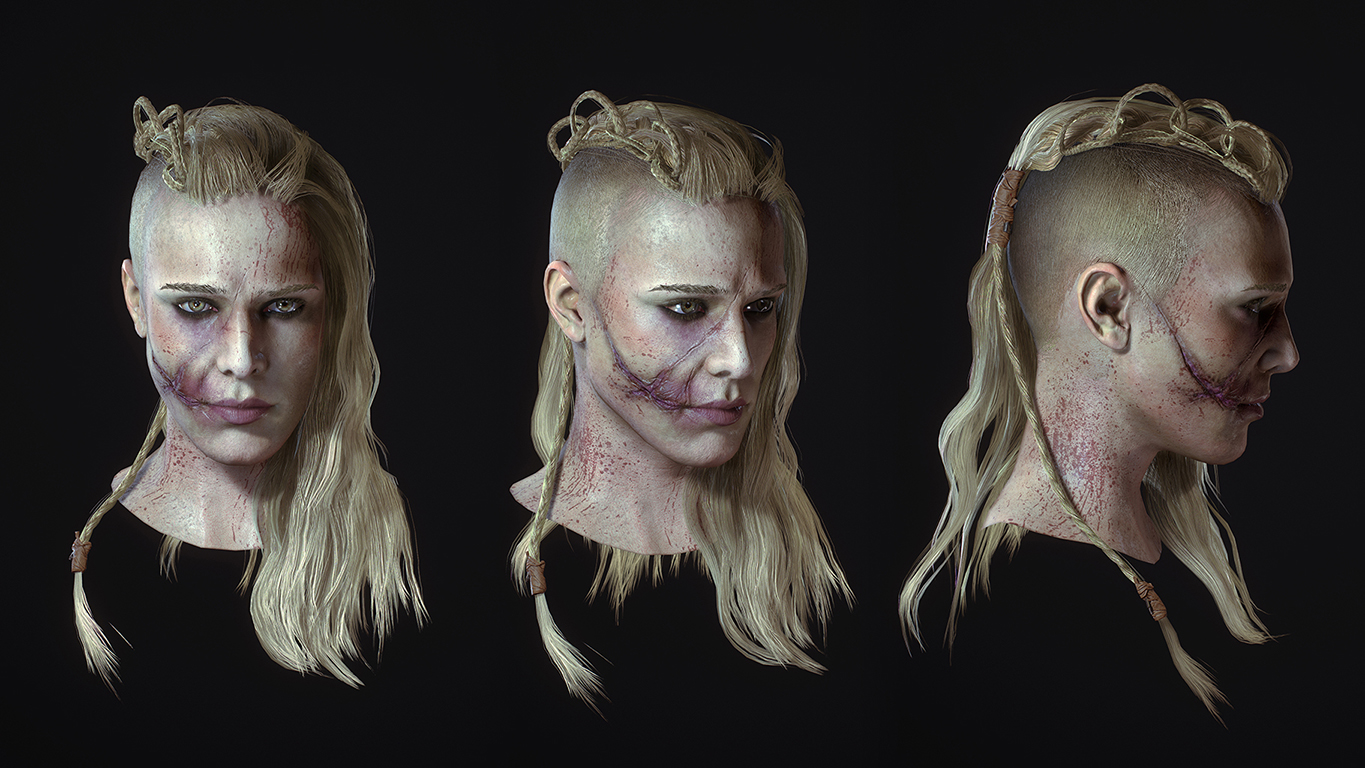
After finishing the textures, I rigged the character in Max, posed her and loaded in marmoset. It took many tests to get the right look with the light’s setup but I’m happy with the final result.
Facebook: https://www.facebook.com/gbuxheli
Artstation: https://www.artstation.com/artist/gbuxheli/profile
Zbrush, WIP, 3D Art, 3d modeling, 3d sculpting, making of porunn, genc buxheli, zbrush art, zbrush scupting, 3d, zbrushtuts