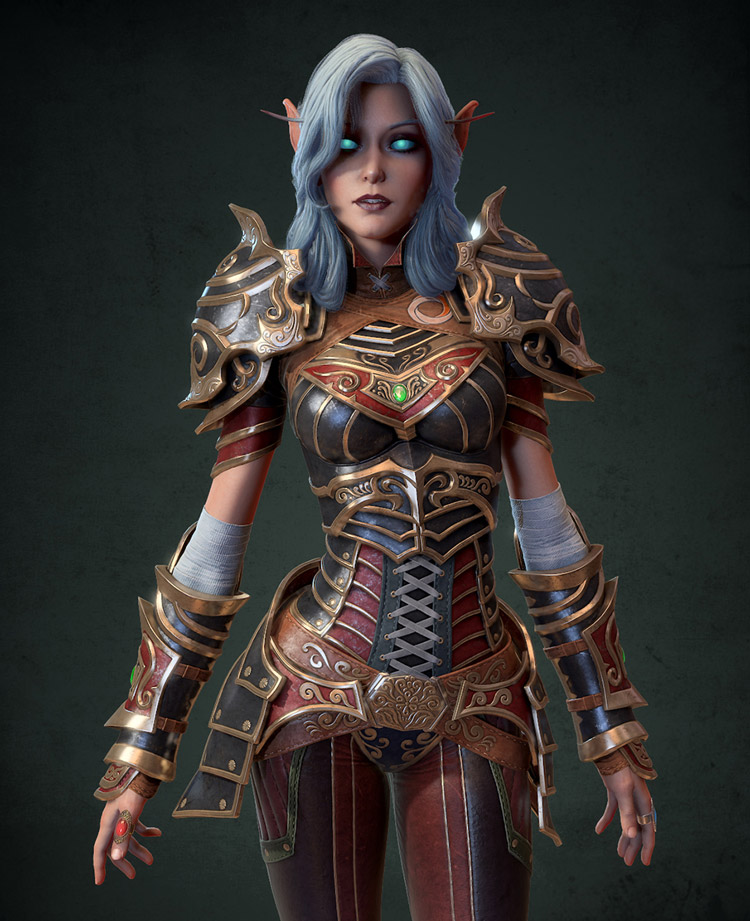
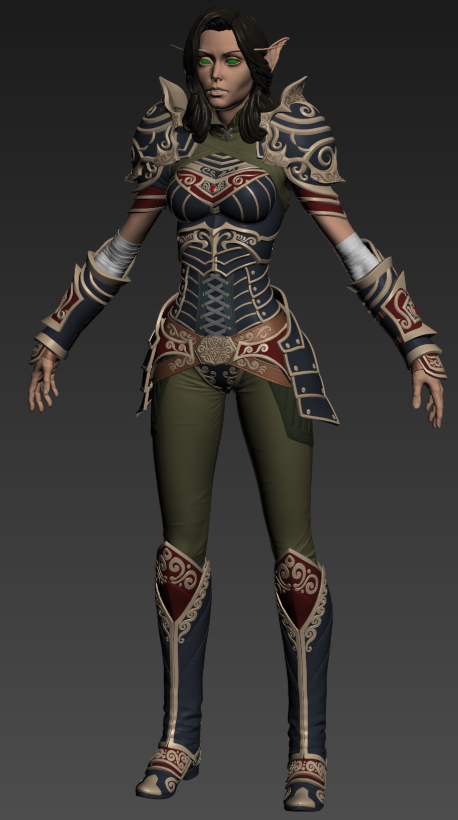
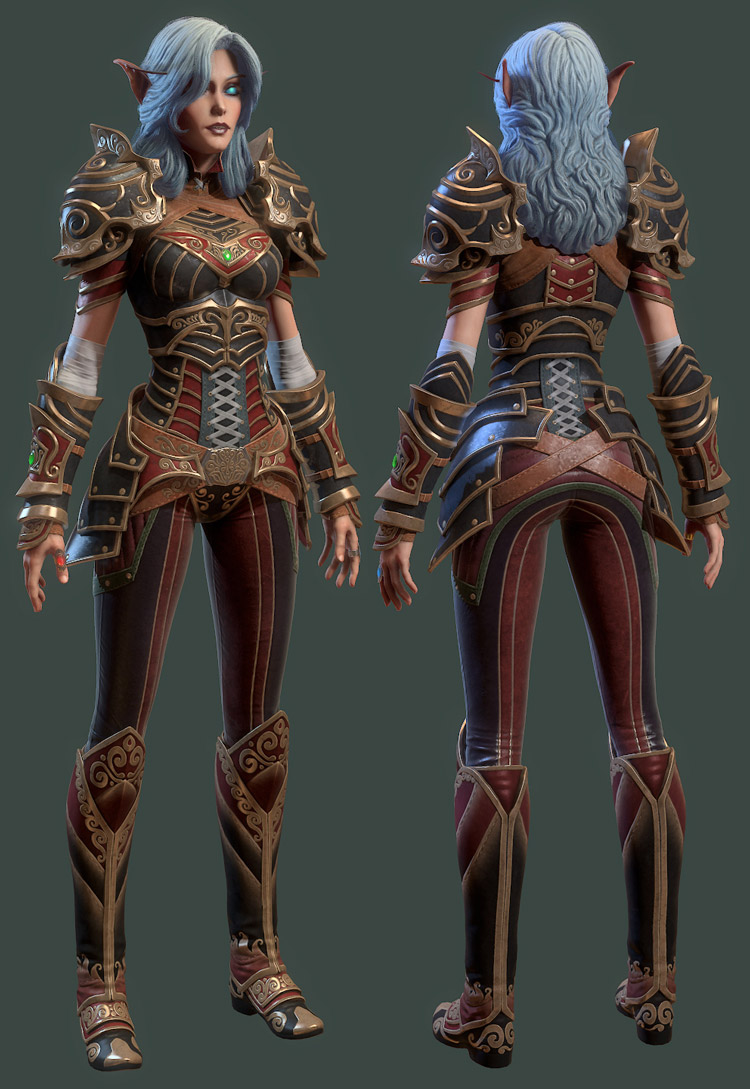
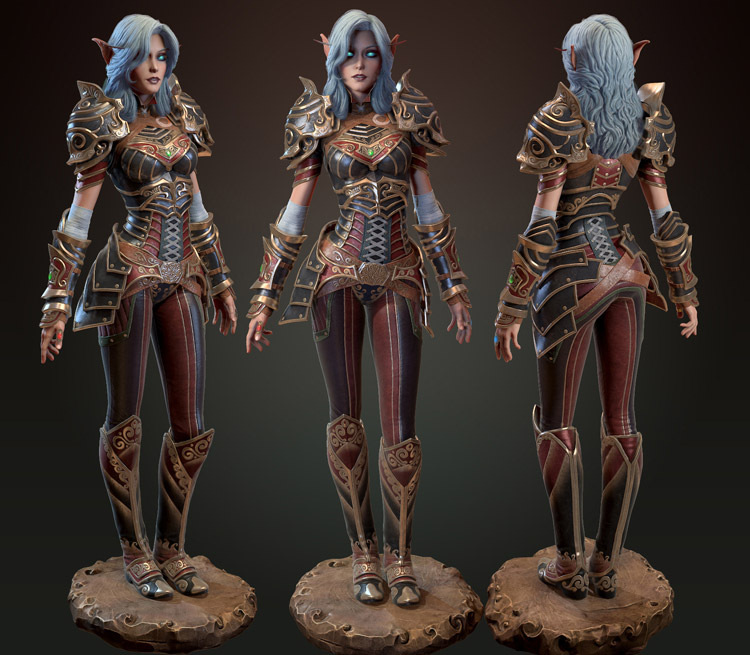
Making Of Elf by Nikita Volobuev
Nikita Volobuev is a 3D Artist from Moscow-Krasnogorsk, Russia.
Modeling
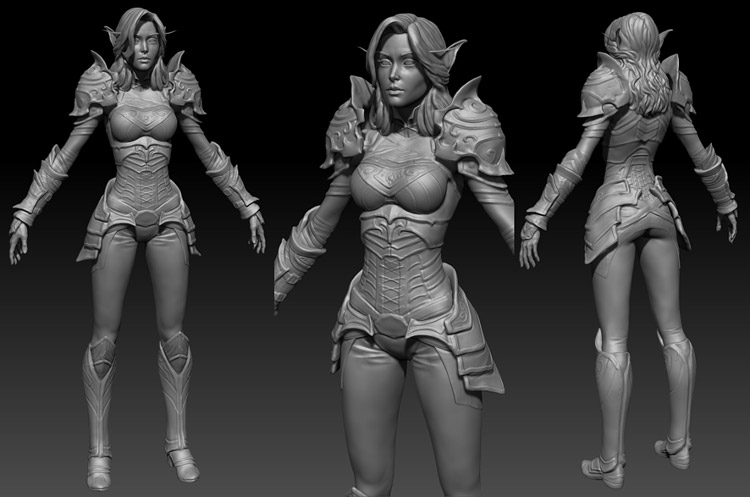
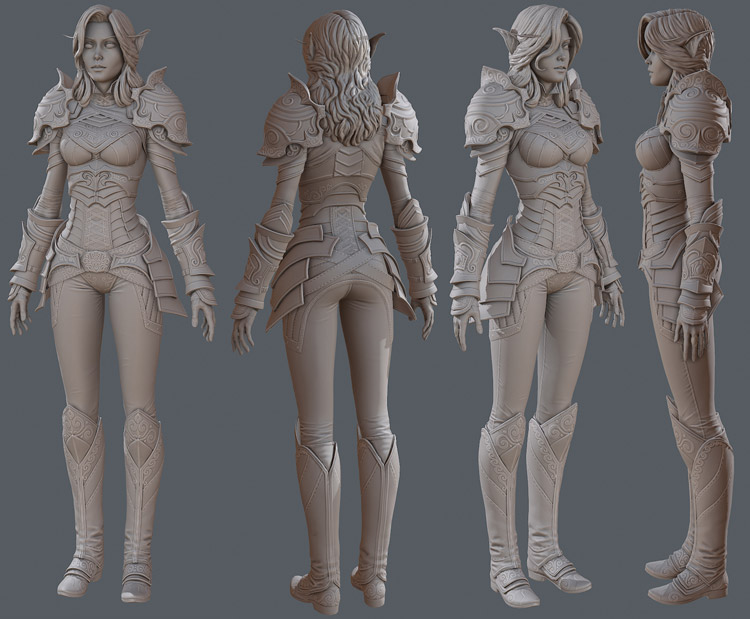
Work began with a sketch in Zibrashe specifically did not take any discs, do all of the primitives brashevskih using tools Dynamesh.
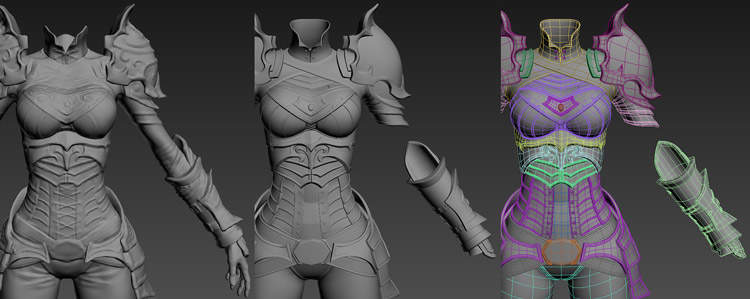
Armor I chipped in 3DS Max and there tools Graphite modeling tools created for their new models.
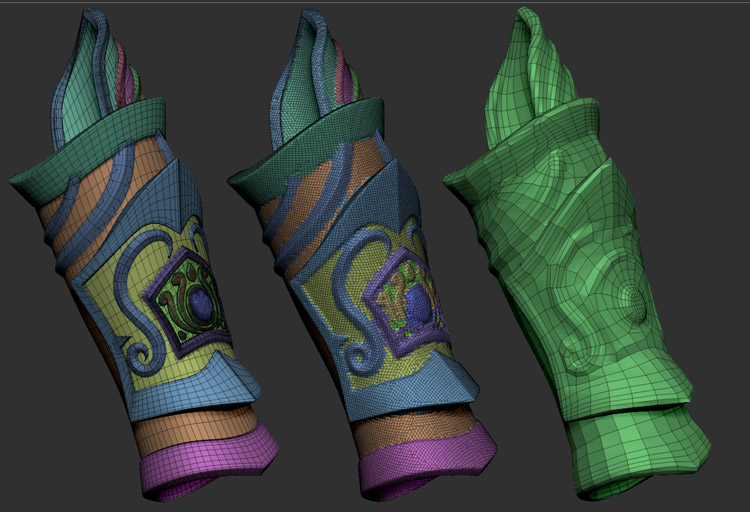
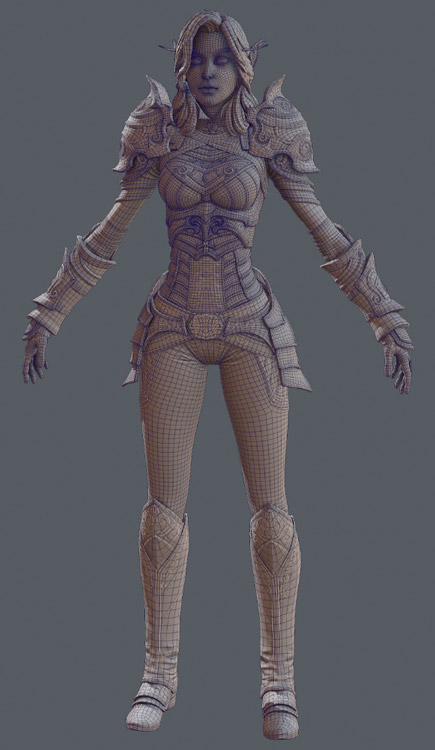
For retopologiyu remaining parts (a head, hair, pants hand – ie organic and soft details of the model), I used the built-in Brush tool ZRemesher. The grid thus obtained is later used to bake them from the upper parts subdivs.
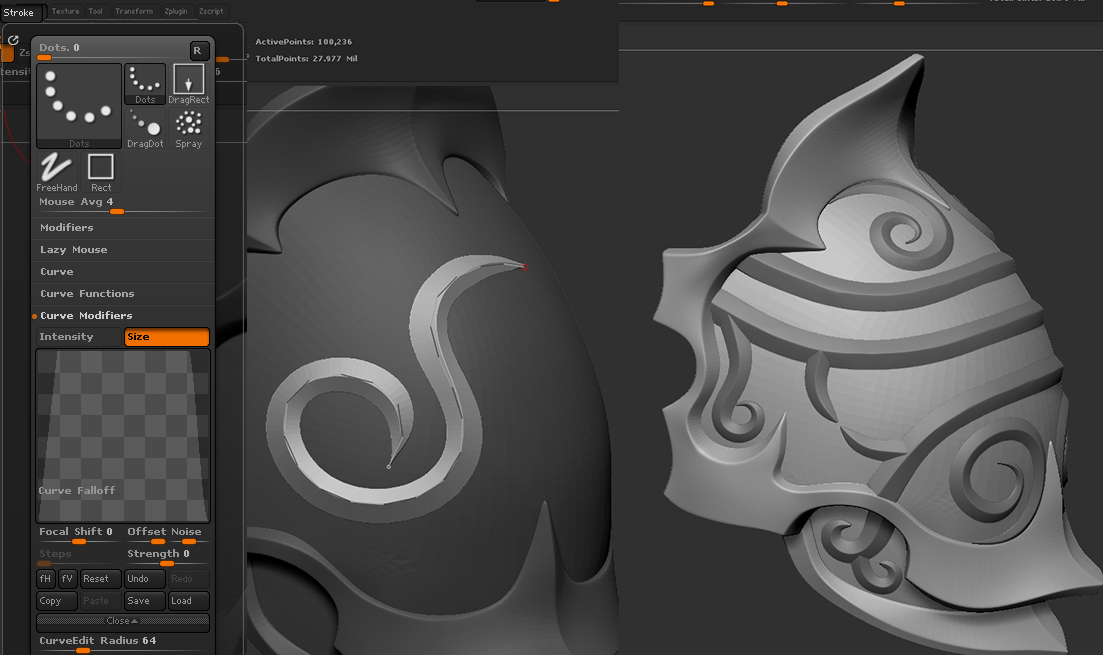
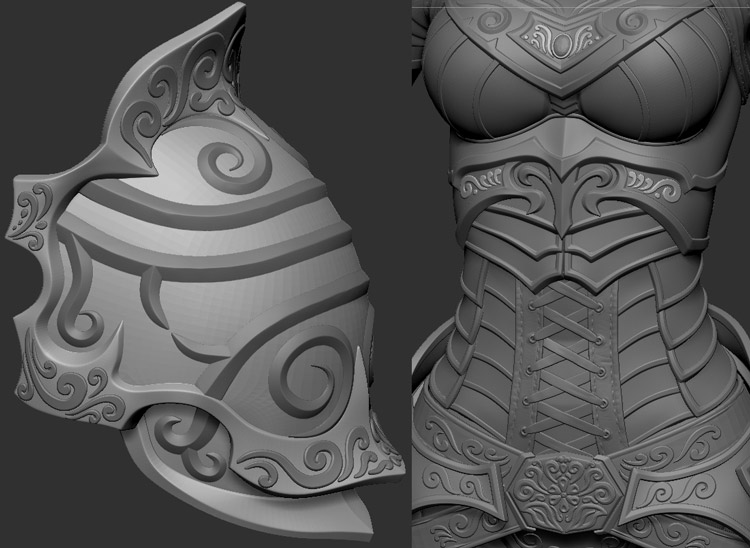
Then I started experimenting with patterns on the armor. As a result, I drew two kinds of patterns. For the first I created a new InsertMesh-brush – in fact it was just a triangular prism.
Learn more about creating 3D brushes you can learn in a training video online http://pixologic.com/zclassroom/homeroom/lesson/insert-mesh/
The properties of the brush I have included a decrease in the radius at the ends of the mesh.
The second type of patterns I made tools Edge Loop – Panel Loops. I duplicated the desired item of armor, sealing grid to a degree sufficient to draw patterns, apply proper pattern usual brush-mask, then Cntrl + W (the creation of on-site mask new polygroup), then applied the Panel Loops – obtained embossed pattern and if necessary blowing pattern tool Deformation-Inflate. For more information on Panel Loops can be found in the video tutorials on the site http://pixologic.com/zclassroom/homeroom/lesson/panel-loops/
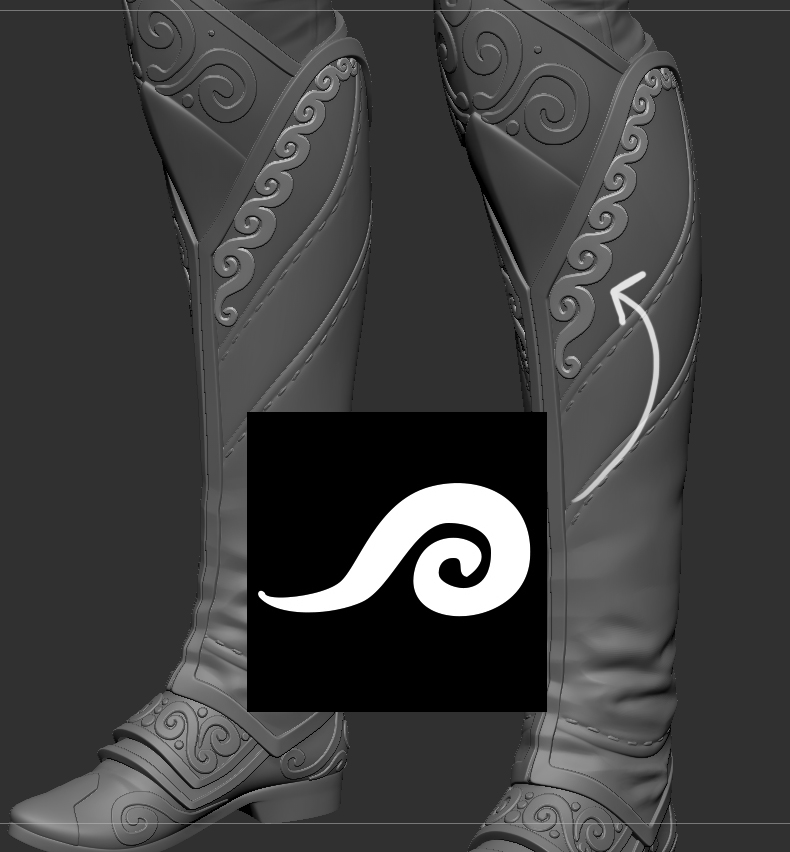
For boots, I still made a mask pattern.
Corset lacing on doing CurveStrapSnap brush with a slight modification – in the Curve – Stroke Modifier including a reduction in the thickness of the edges of the object, just as he did in his triangular brush. Did the first stitches on the one hand, every stitch of his hands, using a brush MSY, tucked under the edge of the corset, then mirror your stitches – lacing ready. When the high-poly model was fully prepared, it began the second retopologiyu to create a lighter mid-polygonal model. Here I am again, for the majority of the elements took advantage of the automatic retopologiyu ZRemesher. Actively used rails ZRemesher Guides. Unfortunately, this instrument is 100% copes with objects that do not have sharp corners. So that the new mesh armor had dopilivat in max – again using graphite modeling tools I just sharpened corners and touched up here and there a grid where it is not turned from Brush. Steps were approximately:
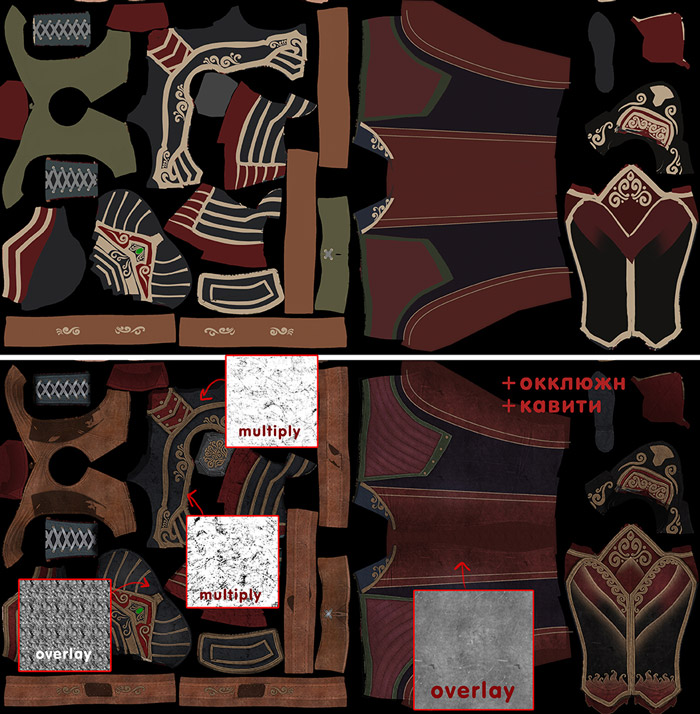
For some objects, such as head or hands, I did not use any new retopologiyu – took advantage of the lower subdivision surface. TEXTURING Before baking the texture I decided to define the colors. The colors I put on model Max. Color model before baking is useful also because then when texturing these colors can be used as masks to enhance detail.
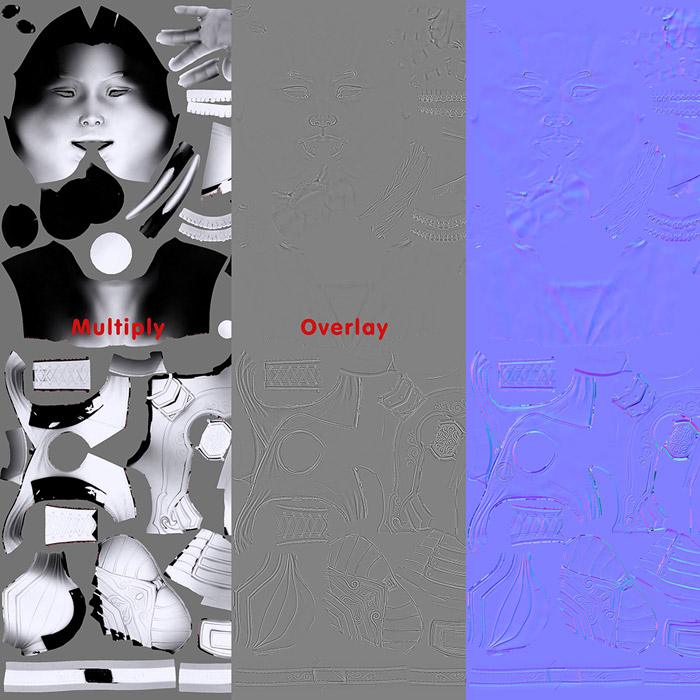
Elements – This haypolnye grid of Brasov, which was applied to the Brush tool Decimation Master for optimization. Bake textures in max. Texture – is Normal, diffusion okklyuzhn. Texture Kavita I get out with the help of Norman fotoshopovskogo plug XNormal.
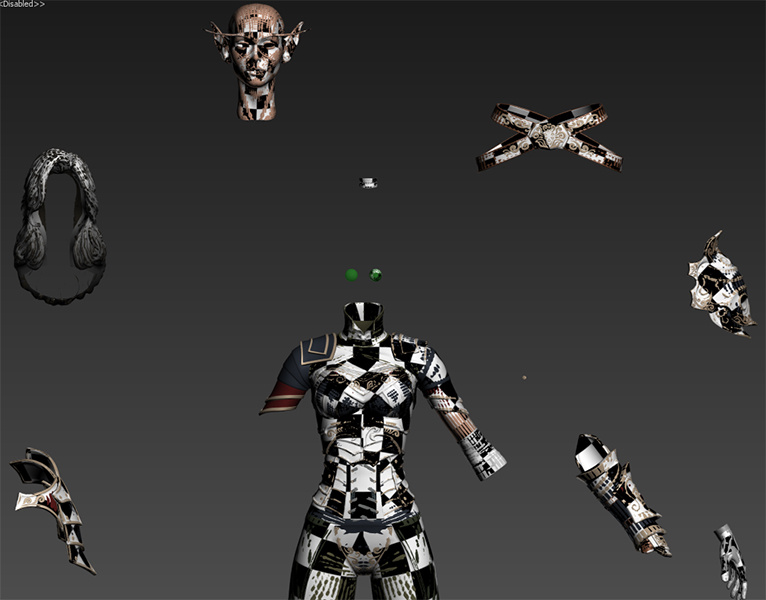
Before baking, I raznoshu model in hand to Projection Cage one element does not fit in the neighboring. Before all the elements of diversity in appointing pivot 0,0,0 – it’s easier then to return to their original positions.
Also I advise texture format for roasting choose png with alpha. So they can be easily put together in Photoshop, using built-in script Load Files Into Stack.
Now the actual texturing.
Yellow pattern, I made a separate layer and further to apply to them the effect of Cast Shadows.
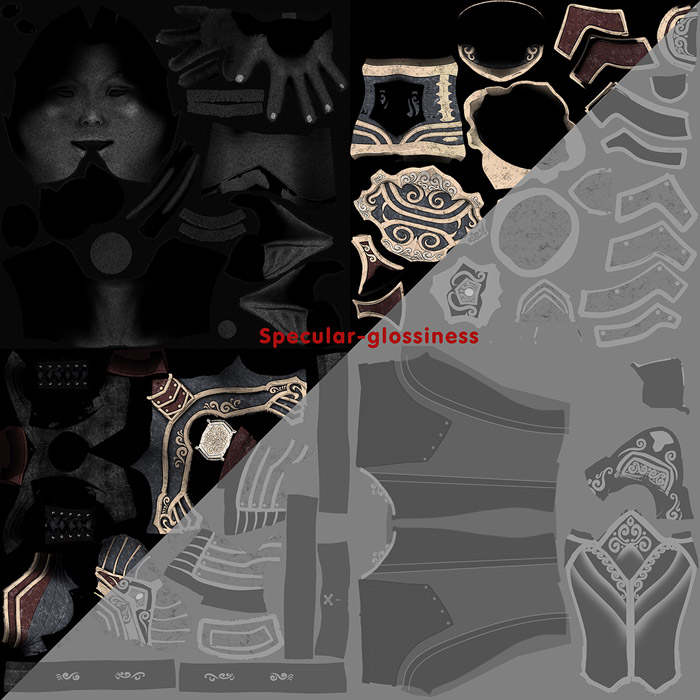
Map highlights on my armor color – because the materials are more like metal. Black scratch with diffuse texture to the specular light steel vice versa, ie, shinier. Gloss on the map – the width of the highlights – those scratches I made darker than the armor thus highlight scratches became broader than under the glare surface scratches. With this comes the highlight of scratches on the dark areas of armor, so the materials look a bit more interesting.
The texture for the face I drew in madbokse, then add texture in Photoshop noise:
Render Before renderer I put the character in the position maksovskim skeleton CAT. I visualize in real-time renderer Marmoset toolbag. Materials: Hair skinsheyder used – it turned out to simulate the scattering of light within the hair.
Armor – a Lambertian material. In general, I see no reason to write about it in detail, there are not many options, all customizable at random – cool sliders and stop wherever you wish. The only thing worth mentioning – the scattering of light inside the stones were simulated by an additional card auroras. But it seems I was a bit overdone, and stones began to natural light, but this effect has liked me, and I left it.
Leather clothing – a Microfiber material. In principle, it is not quite correct, because mikrofiber created to render fabrics with fibers. But it has the effect of lightening the object at the edges, and I decided to use it for a clearer separation of clothes from the armor.
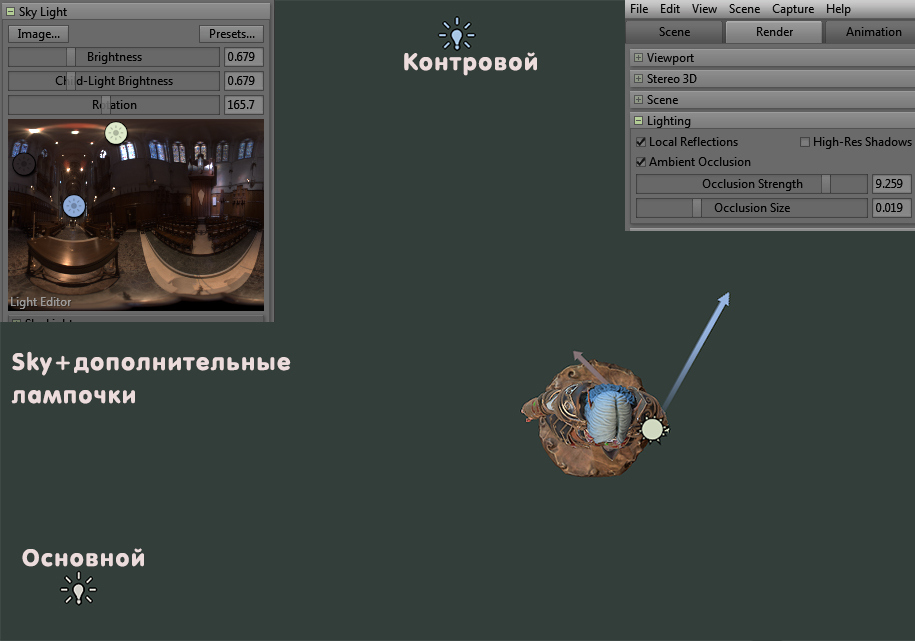
Leather – it skinsheyder material with him the same story, it’s simple, customizable brute-force slider, which is not much. Lighting: Lighting simple – the light from the pictures with the surroundings, plus two light sources. In Marmosete an interesting feature in the texture of the world – you can click it to enhance the brightness of the individual sites, so the lighting can be made more interesting.
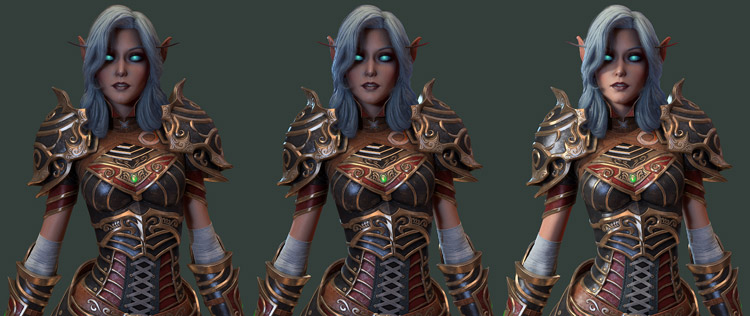
It is also important not to forget to include in the local settings of reflection and screwed okklyuzhna. Composite last stage. Here the tradition all too easy. Adjusted brightness level, add shine to the most vibrant areas. Still, the finale.
In conclusion, I would like to share information with those who for whatever reason missed from Valve useful booklet with tips for creating characters. The book is called Dota2 Character Art Guide, is easily found in Google. The described techniques there helped me a more systematic approach to the design of this character. Thank you all for your attention.
Artstation: https://www.artstation.com/artist/nikitanv/profile
Elf, 3d art, 3d modeling
 zbrushtuts Zbrush Tutorials, Art and Breakdowns


