A 3D workflow By Mickael Lelievre
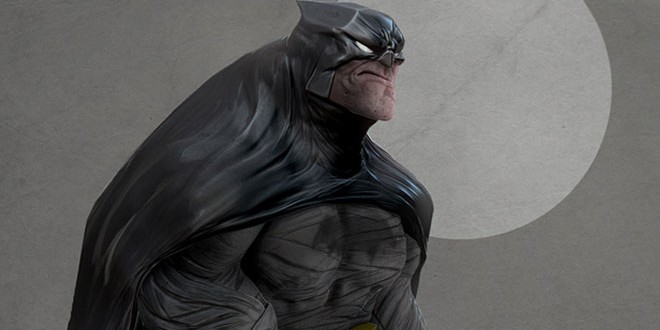
In this post you will see how Mickael Lelievre (aka Art of Abby) modeled the awesome Batbadass in ZBrush. Software used:Photoshop, ZBrush.

Modeling
Mickael was in awe of a sketch of Batman by Joverine. He knew straight away that he just had to sculpt this character; his posture, head and expressions, along with the proportions, were what drew me to this image. He have looked at lots of ZBrush tutorials from artists such as Rafael Grassetti, Furio Tedeschi, Marco Plouffe; there is so much to learn from them and they have given me ways to use ZBrush more efficiently.

He started off with making a bust of the head to see if he could quickly capture Batman’s expression. He used the Move, hPolish, Clay Buildup, and Clay brushes to create and develop the head and expression. Using DynaMesh in ZBrush he roughly sculpted in the basic proportions of Batman quite roughly. He had his proportions and all the rest in mind.

Modeling and detailing
He have now developed several ways of using ZBrush and find that modifying alphas of a brush is great for not getting lost in the panels of brushes that ZBrush has to offer. The Standard, ClayTubes and Clay brushes are handy for efficient construction; our control over them is high because we can change their alphas when necessary. Understanding and modeling correct anatomy is also a crucial part of any character sculpt; you need to give the body weight and plausible structure, as well as correctly positioning the weight according to the pose. Bearing can make or break a model.


Light
Gumroad allows us to apprehend with “ease” the PolyPaint along with the BPR render. This tutorial is pragmatic and reassuring. Everything comes more naturally as soon as we understand its ways and uses.
Rendering and compositing
He used Rafael Grassetti’s tutorial on rendering to help him understand how to use PolyPaint and BPR render. He found that having watched the tutorial he was able to use them more naturally and understand their possible applications. Once He had all the passes he needed, He put them together by building a stack of layers in Photoshop. By using the Layer and Clipping masks He was able to play around with the lighting and reflections as well as the textures and colors.


Finalization
With all the passes and lighting sorted all that was left to do was fiddle with the levels and curves in ZBrush to add texture and a certain depth to the image. We hope you have found this quick workflow useful.


Website: http://artofabb2.wix.com/abbyart
Zbrush tutorial, 3d, 3d modeling, 3d sculpting, mickael lelievre, zbrushtuts.com
 zbrushtuts Zbrush Tutorials, Art and Breakdowns


