Dragon – Making Of by Truong
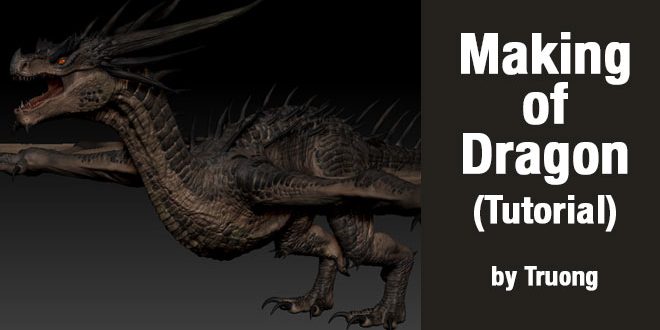
Truong shared his Making of Dragon with Zbrushtuts.com. See below:
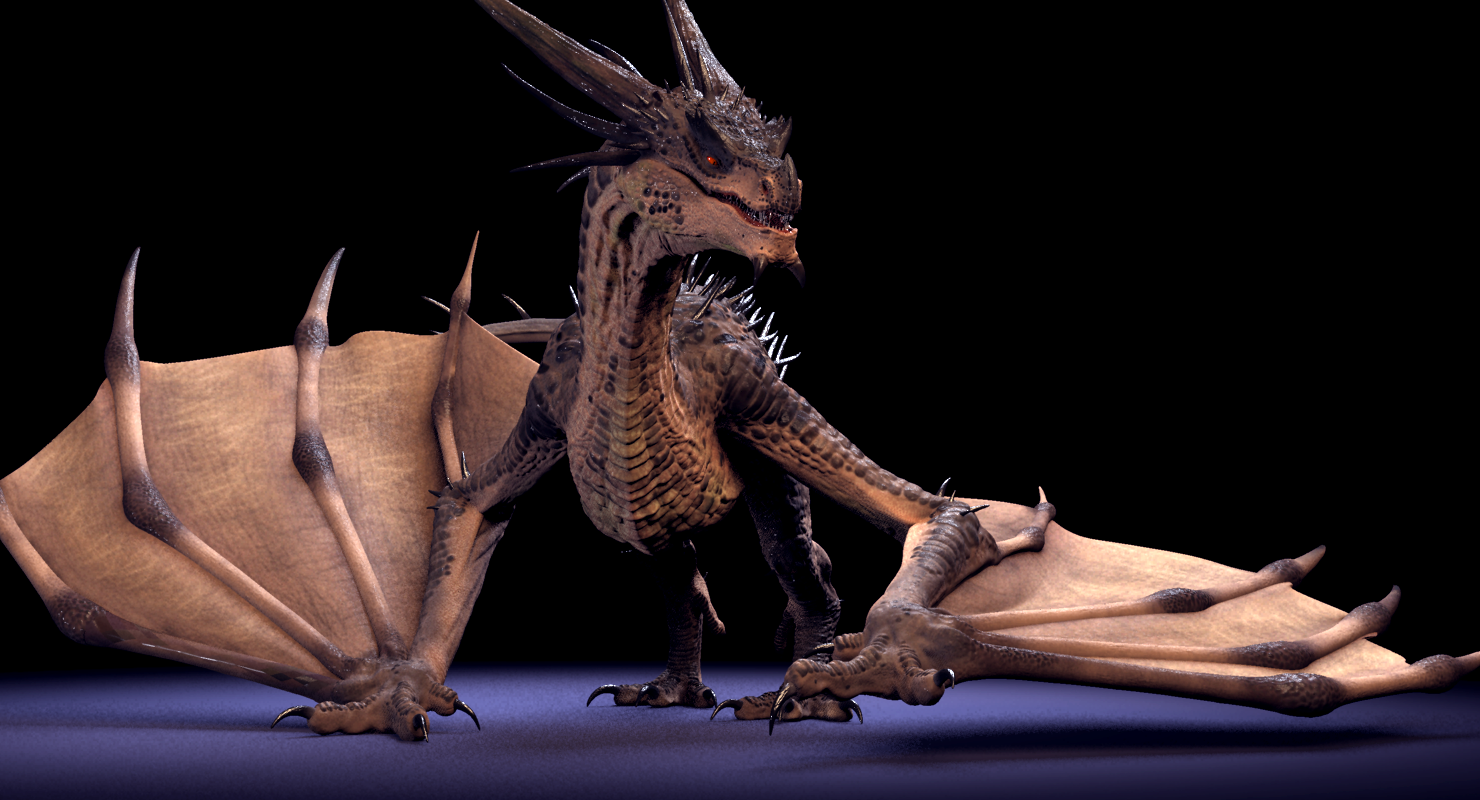
Hi there, In this making of I will show you what I did (and learn) to bring the dragon to life. Instead of showing you all the detailed steps (which is too long), I will list all the links and resources that you can learn (for free) and do the same as what I did. Also, I will mention some tips I did along the way, hope this help. 🙂
1. Sculpting
Software: Pixologic Zbrush
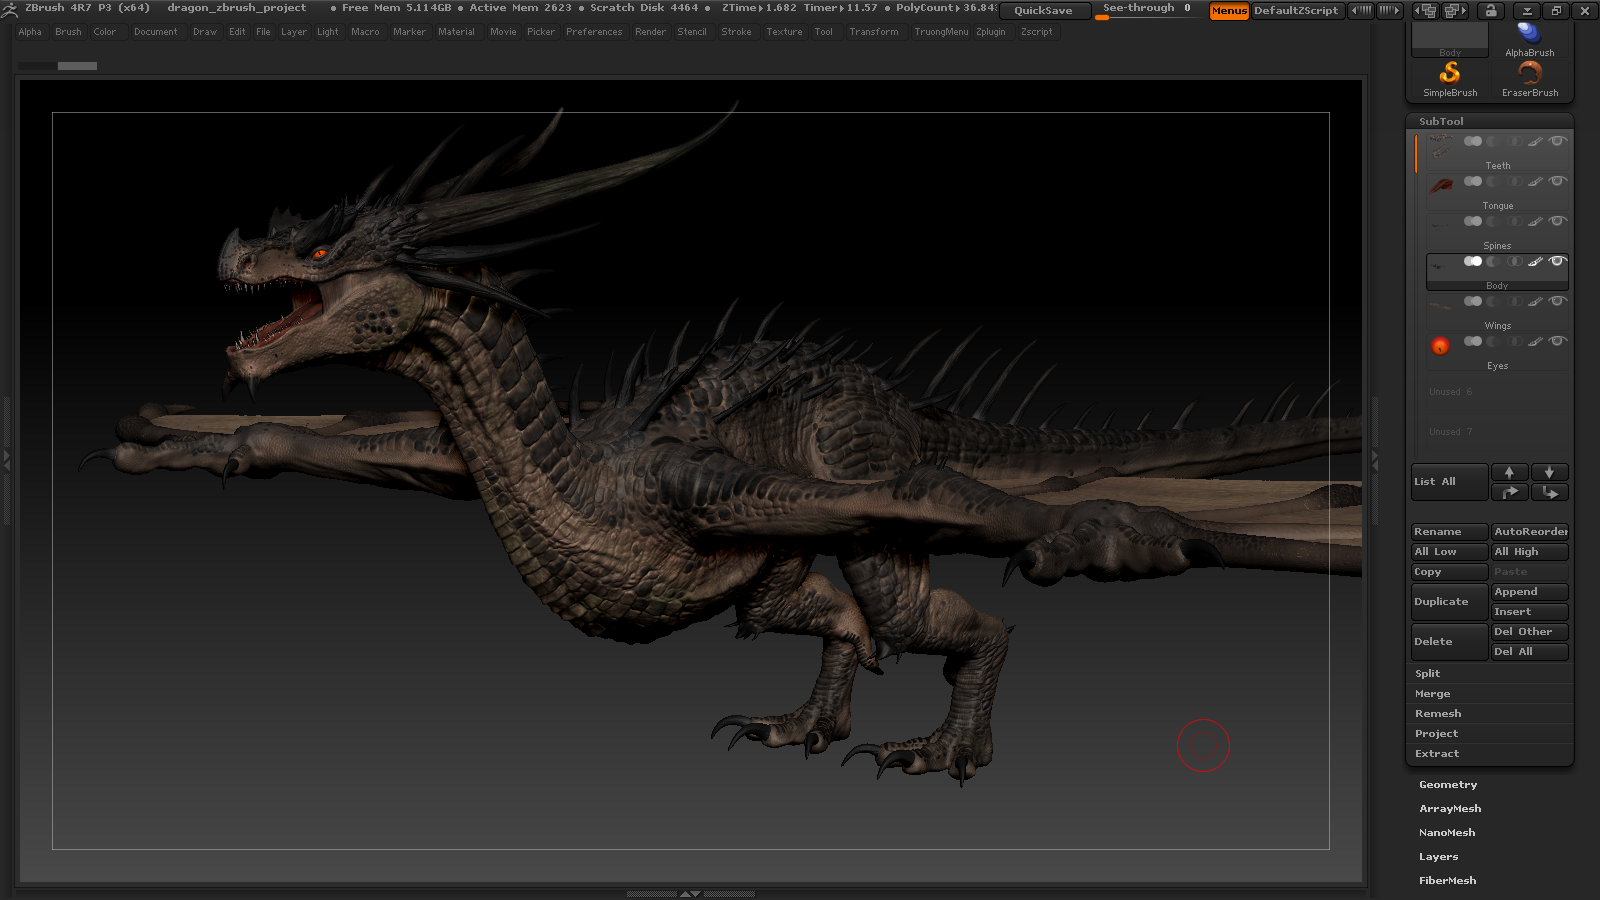
First, I choosed to model a dragon based on concept art by Jaemin Kim. If you want to bring an image in to zbrush as reference, Spotlight is a perfect tool. I started with Zsphere to block out the main shape. This is an old tool but fast and effective. When the topology is too messy, I turned on Dynamesh and continued sculpting.
2. Re-topology
Software: Topogun
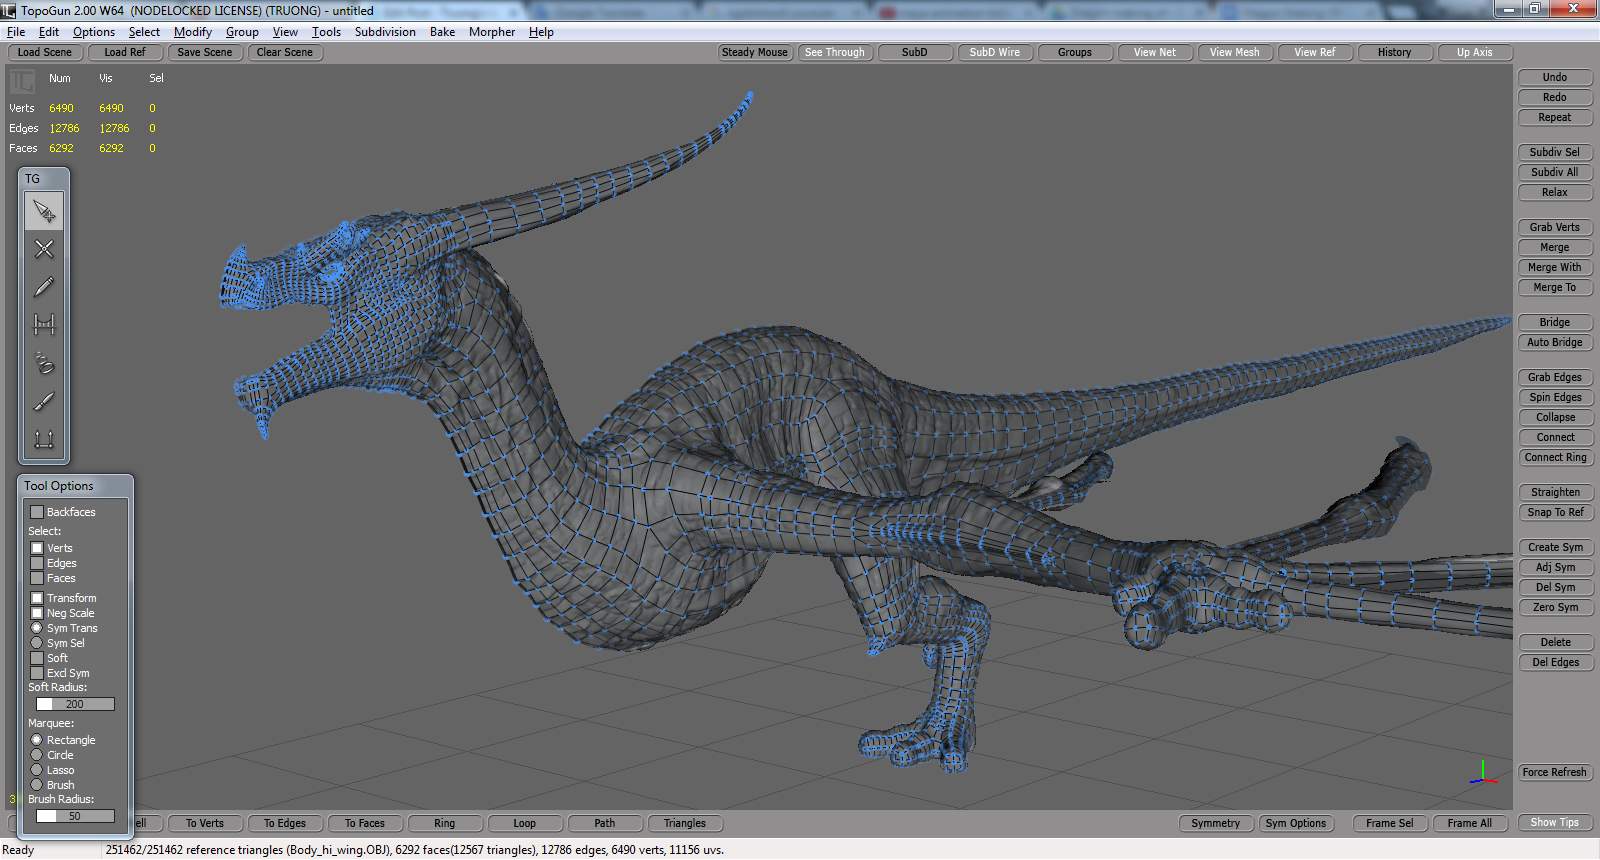
In ZBrush, when the main form is done, I cut half of the model then decimate it using decimation master and bring it to Topogun for re-topology task.
Note: To export & import file between software, the common format is .obj
Why cutting half of the model?
Because you can see the middle line clearly and you only need to retopo half. Also, symmetry is not working well in Topogun. When finished you can mirror the model in Maya.
3. UV
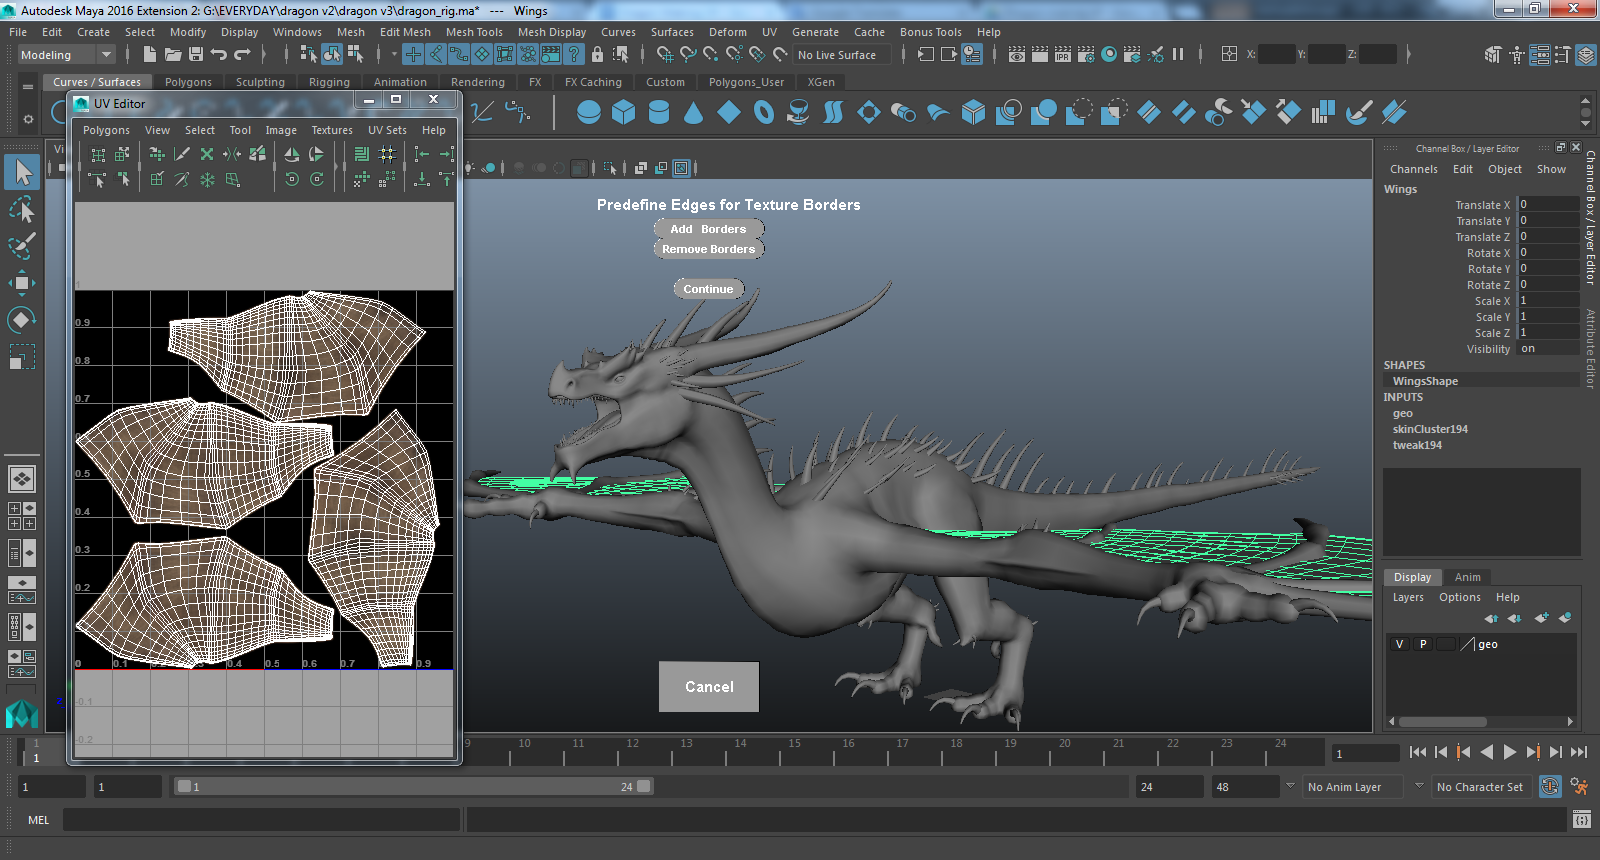
When the low poly version was done, it’s time for UV. There are some options for UV tasks: UV in Maya, UV in Zbrush using UV Master, UV Headus Layout. And the fastest as well customized workflow I can find is auto Unfold from Maya Bonus Tool (in the end part of this video).
4. Exporting maps
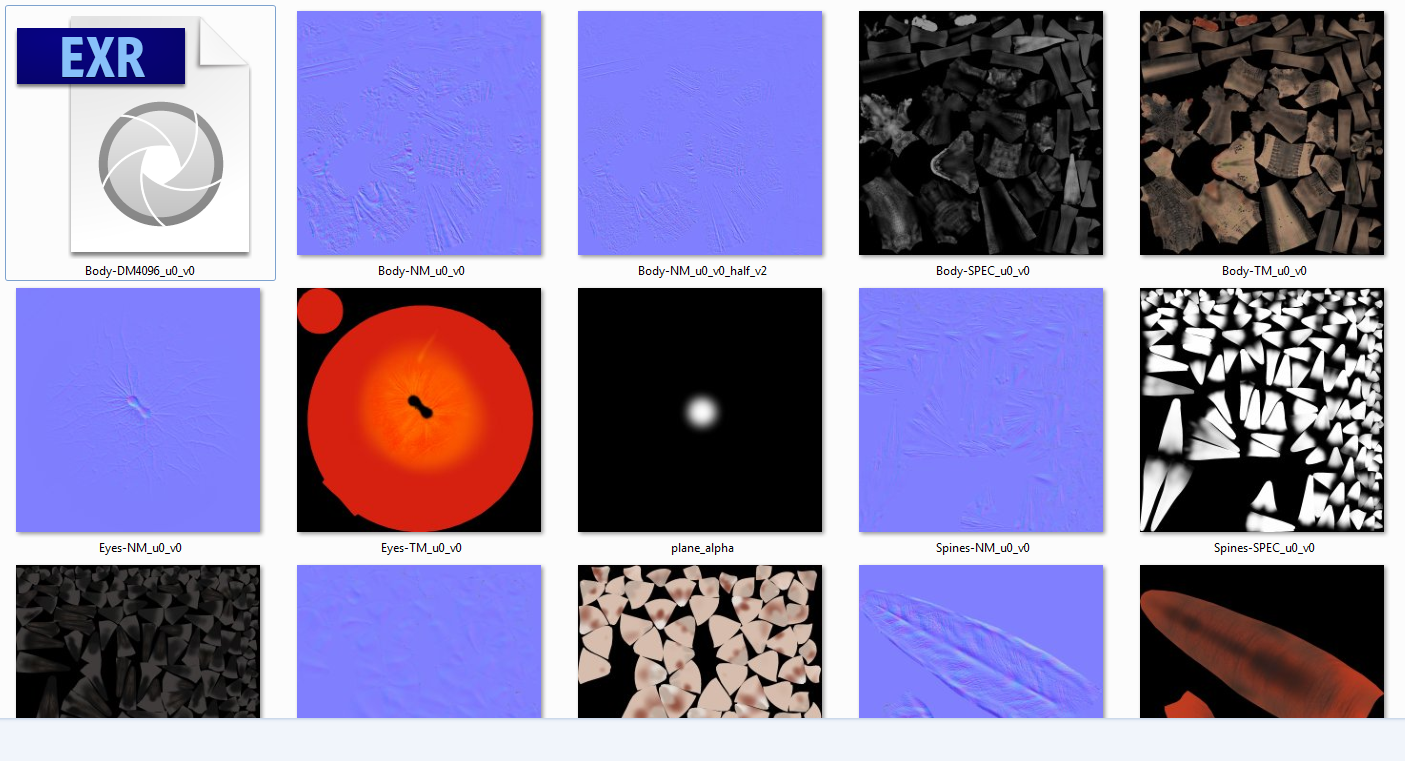
Import the .obj file (done UV) into Zbrush using MultiAppend (Zplugin > Subtool Master > Multi Append). Then project the details from old model the new one (done uv), using Project All (you can also project polypaint using this method). Fix & sculpt or paint more if you need. Then we can export the maps using Multi Map Exporter. You will need: Color map, Specular map, Displacement map or/ and Normal map.
5. Shading & lighting
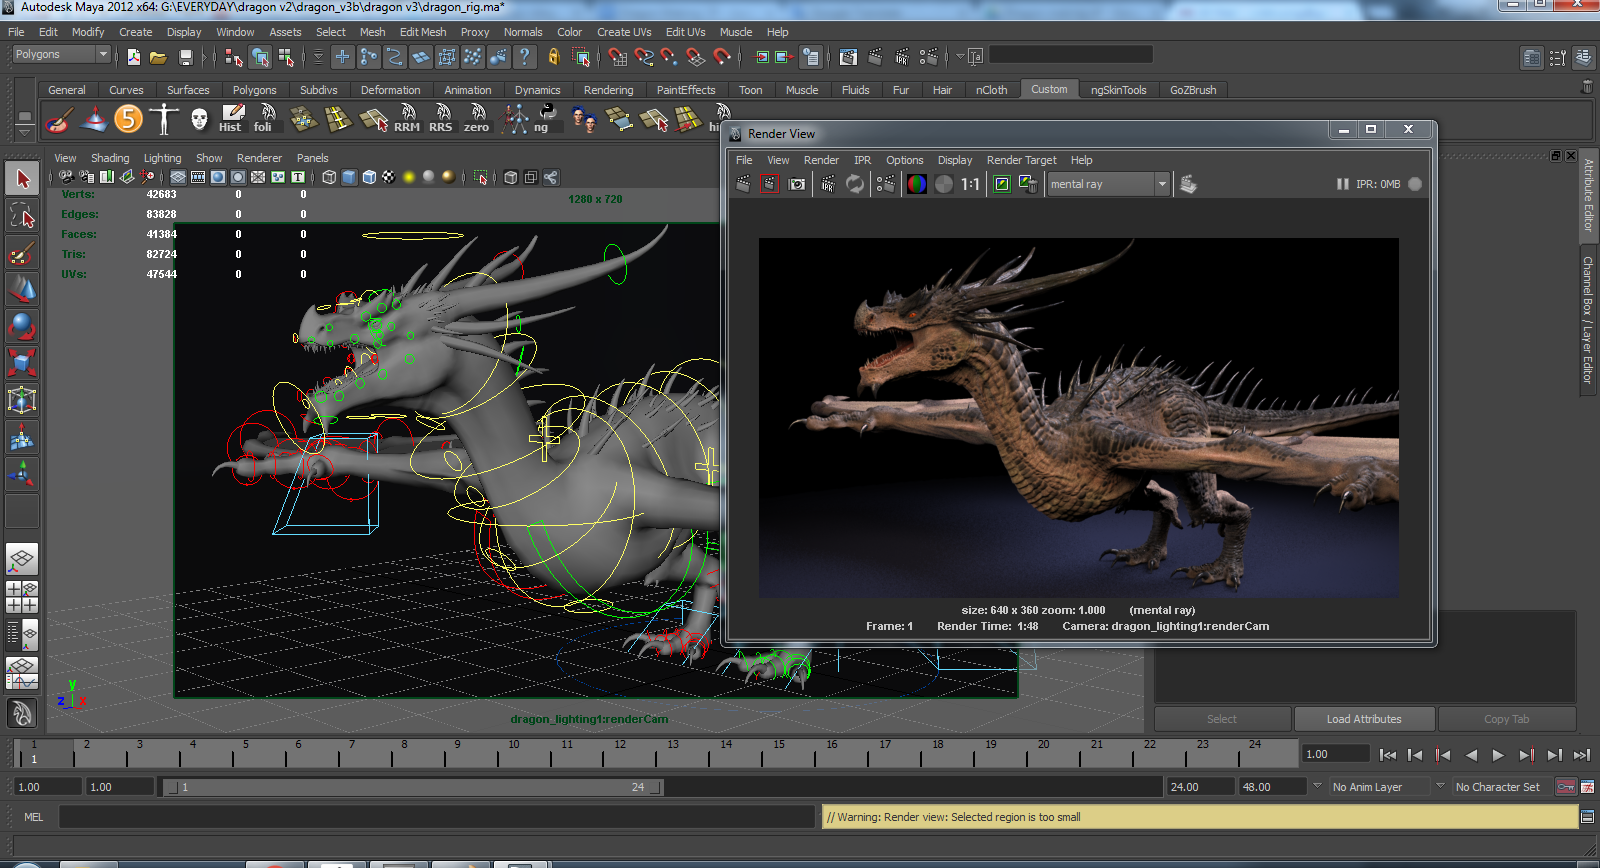
This part totally depends on the renderer of your choice: mental ray, vray, arnold, redshift, etc… For realistic rendering, you might need to research Linear Workflow. On my dragon rig, I used mental ray. Maya 2016 has some changes on how to work with linear space, also Maya 2017 includes Arnold as the default renderer, instead of mental ray. Also, I’m switching to Redshift, which is incredible fast in my opinion. To conclude this madness, pick your weapon then learn only this (then learn more option if you want).
6. Rigging
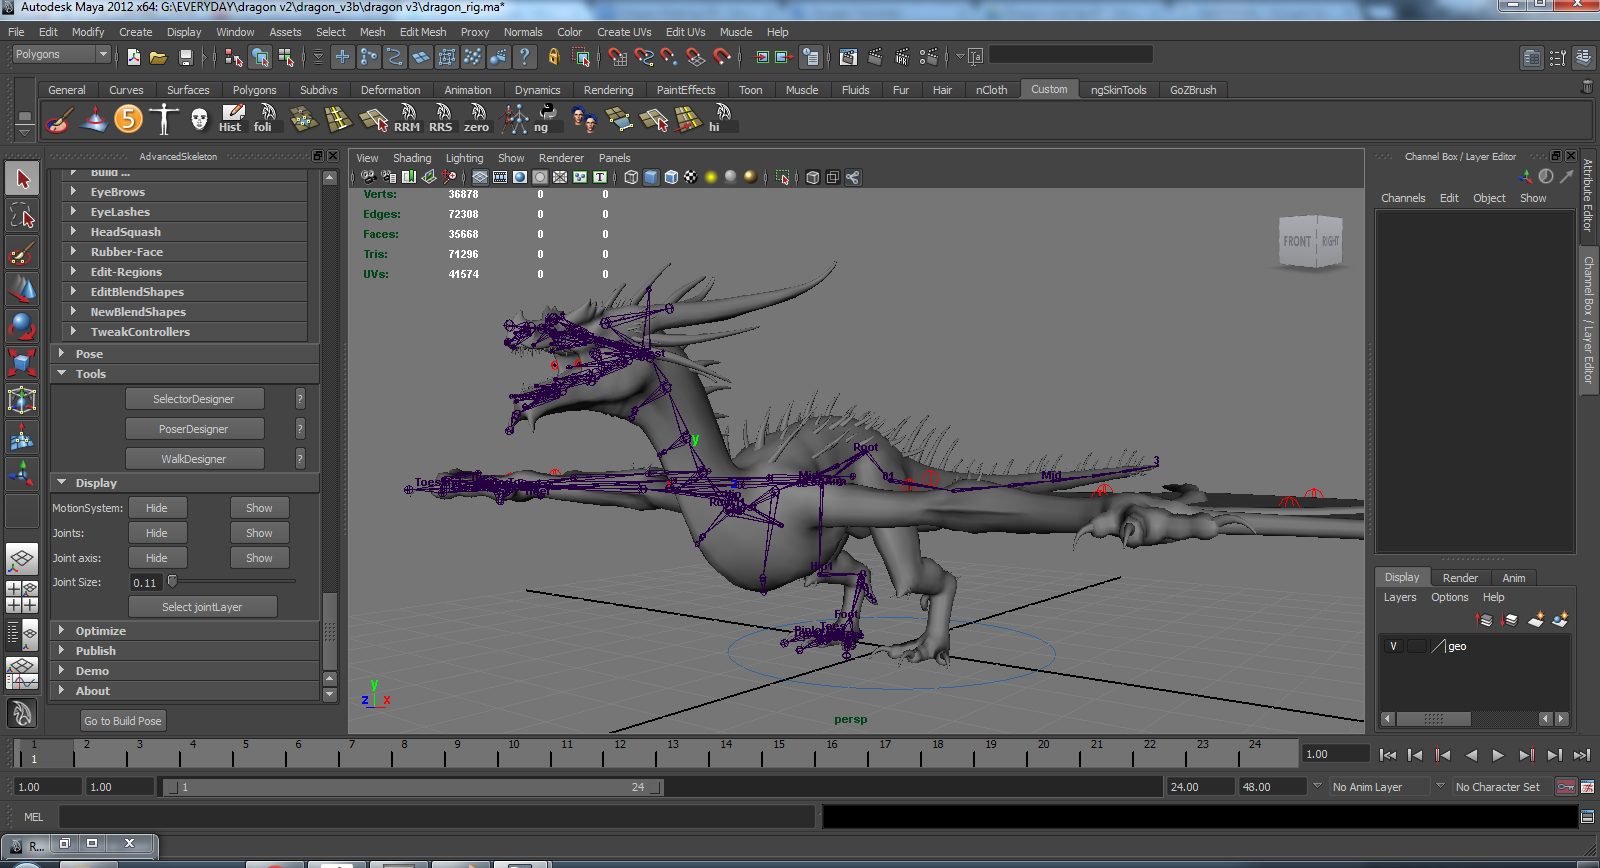
Why lighting before rigging? You can do the other way around. The order is not really important if you’re use referencing, but be aware of nested referencing, this may cause you some problem. For rigging task, I used Advanced Skeleton, which is free for non-commercial purpose. You can learn all about how to use the script here.
7. Skinning
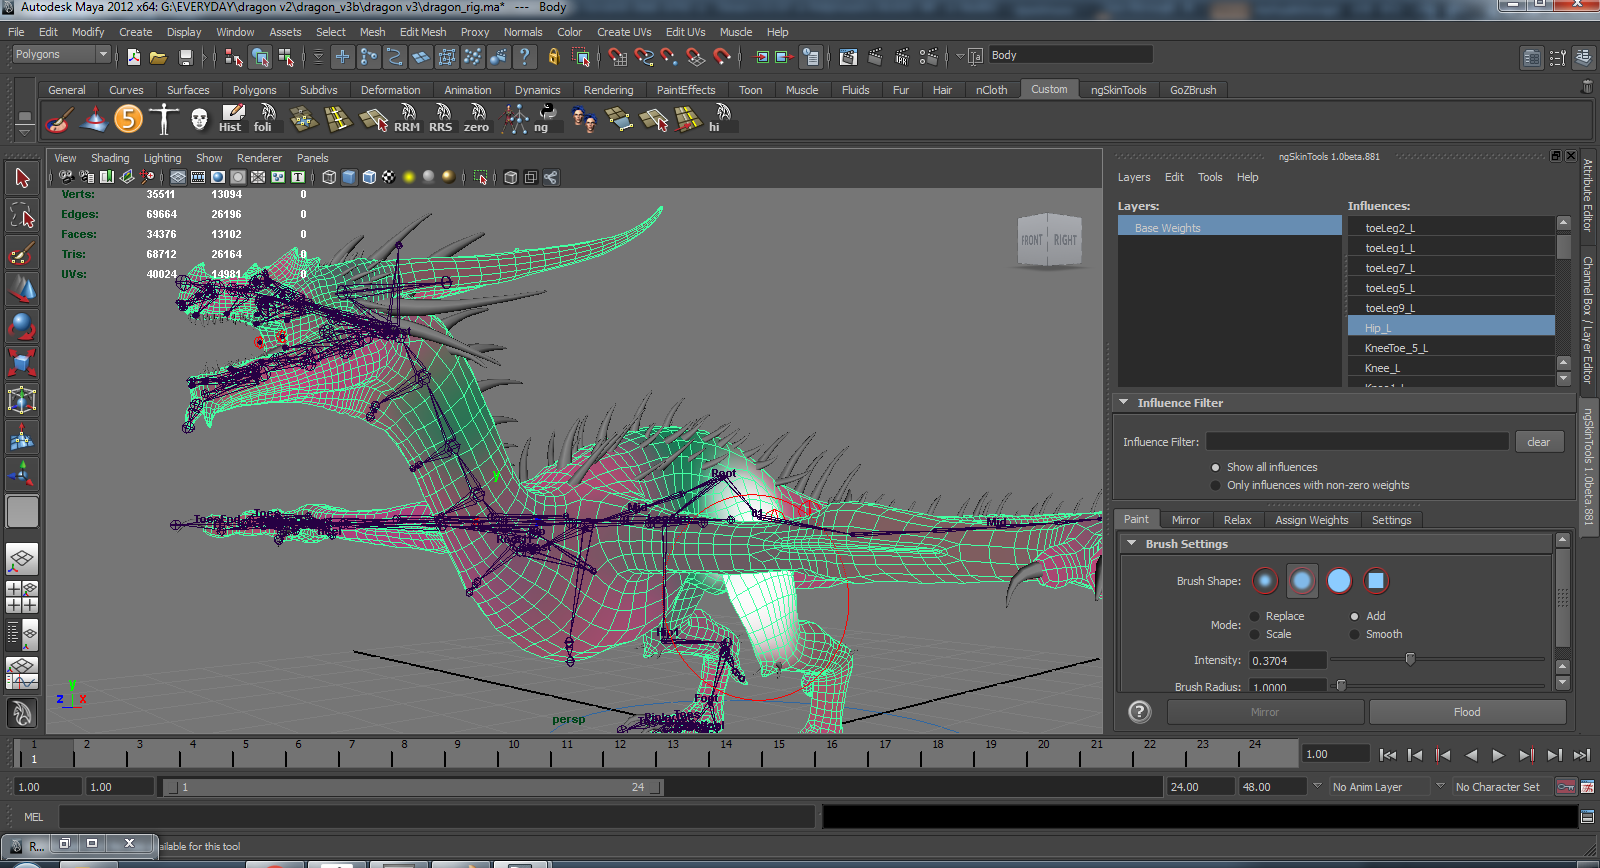
Advanced Skeleton has skinning tool inside it, but I find ngskintool is better for skinning task. The relax tool is cool and the layer is much like Photoshop masking.
Download the rig, zbrush project and practise yourself
https://gumroad.com/truongcgartist
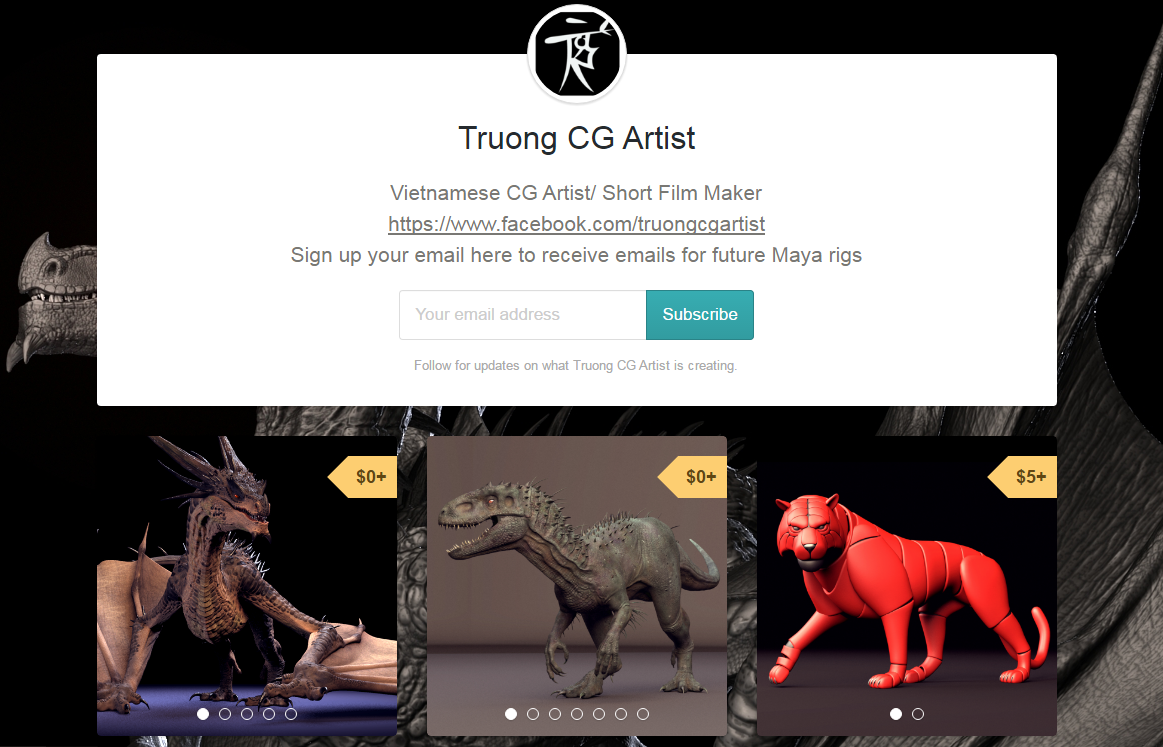
The Dragon Maya rig and ZBrush file is free at my gumroad page, you can download him (and my other rigs) there. I know it’s long and complicated process (3D is never easy), therefore if you have any further question, feel free to ask me at my facebook page.
Cheers!
Truong
References:
Pixologic Zbrush: http://www.zbrushcentral.com/
Zclassroom: https://pixologic.com/zclassroom/
Dragon inspired: https://www.artstation.com/artwork/488Y
Jaemin Kim: nhttps://www.facebook.com/jaem1999/
Spotlight:
Zsphere: https://pixologic.com/zclassroom/workshop/zspheres
Dynamesh: https://pixologic.com/zclassroom/workshop/dynamesh
Decimation Master: https://pixologic.com/zclassroom/tag/Decimation+Master
Topogun: https://vimeo.com/topogun
UV in Maya:
UV Master:
UV Headus Layout:
auto Unfold from Maya Bonus Tool: https://apps.autodesk.com/en/Detail/Index?id=8115150172702393827&appLang=en&os=Win64
Project All:
Multi Map Exporter:
Color Map:
Specular Map:
Displacement Map: http://maxdepth.tv/zbrush-multi-map-exporter-creating-multi-tile-displacement-maps-rendering-them-with-vray-for-maya/
Normal Map:
Linear Workflow: http://greyscalegorilla.com/tutorials/what-is-linear-workflow-and-how-can-it-help-your-renders-look-better/
Redshift:
Referencing:
Nested Referencing: http://blog.artella.com/post/147359981156/asset-production-collaboration-that-works
Advanced Skeleton: https://www.facebook.com/AdvancedSkeleton/
How to Use Advance Skeleton: https://www.youtube.com/user/AdvancedSkeleton
ngskintool: http://www.ngskintools.com/
ngSkinTools essentials: https://www.youtube.com/playlist?list=PLvzkNXBY-S-Wc8J-otiubQ5qDfVvTd8Zn
Gumroad Page: https://gumroad.com/truongcgartist
Facebook: https://www.facebook.com/truongcgartist/
3d art, zbrush, zbrushtuts, cg art, 3d modeling, zbrush sculpting, zbrush tutorial, tutorial zbrush, zbrush tutorials, tutorials zbrush, free zbrush tutorials, tutorials free zbrush, free zbrush
 zbrushtuts Zbrush Tutorials, Art and Breakdowns


