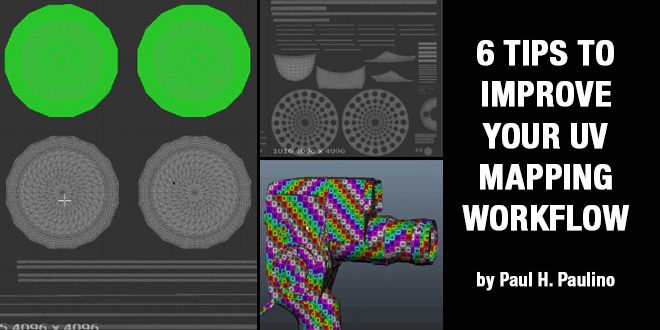
6 TIPS TO IMPROVE YOUR UV MAPPING WORKFLOW by Paul H. Paulino
PAUL H. PAULINO is a Texture Painter/Look Development Artist at Scanline VFX from Vancouver, Canada. Paul shared his latest article with zbrushtuts.com. Hope you liked it and will be inspiring.
In this article, I’m going to share with you a few UV’s tips and tricks that I’ve learned in the past two years that I hope can help you get ready for the VFX industry. If you have missed my latest articles and tutorials, check out this page! I hope you enjoy the reading.
Articles
UV’s are often considered one of the most tedious and easily ignored tasks in an asset pipeline, and I totally understand that you might hate this process and just want to get rid of it as soon as possible to start painting your beautiful textures, right? But the thing is if your UV’s are not unwrapped or layout correctly you are going to have a massive headache down the road.
That’s why I decided to write this tutorial to help you understand a few concepts that might help you save some time in the future and also make a good impression on your peers. This workflow mostly applies to VFX work, but some of these concepts might be implemented to games too.
That being said, the techniques I’m going to share with you were things that I’ve learned from friends, mentors, and colleagues, and you have the right to disagree with them because they are mainly personal taste. I want to give a shout to my dear friend Christian Peck, who was the guy who was patient enough to teach me almost everything about UV’s and Justin Holt who helped me upgrade these skills to another level.
Let’s get started:
WHY GOOD UV’S ARE CRUCIAL?
The task of unwrapping and laying out UV’s varies from company to company. Some studios have the modelers doing it and others, the texture painters.
If you’re a modeler, it is essential for you to understand how painful it is for a texture artist to receive bad UV’s. When a painter is dealing with an asset with multiple materials and tiles, we have to paint masks and painting those masks we have to make unique selections in MARI. If the UV’s aren’t organized, that task might take a long time to complete, and we’ll end up wasting the company money.
On the GIF below you can see a good example of good and organized UV’s. Space is well used, and everything is easy to understand and select.
Now this one you can see the bad example of UV’s. Even though their unwrap might be okay and without any stretching, there’s a lot of wasted space, and it is hard to find pieces.

If you’re a texture painter and you’re not unwrapping, it is equally important to communicate with the modeler who is dealing with the UV’s. Let him know if you have any specific request in advance, such as organization, specific cuts and etc.
Good UV’s are going to save money and time. And you’ll also make good friends. When I’m working on an asset and the UV’s are perfectly laid out, I make sure to tell the modeler how awesome he is!
1 – DEFINE YOUR RESOLUTION
While working on a hero asset, I like to determine how close the camera will ever get to the object. In production, you can get this information with your lead or your asset manager.
The general rule for film is that there should be double the final resolution of the piece in texture resolution. For example: If your screen output will be 2K and your UV tiles are going to be 4K, the pieces that you see in your Maya screen should be doubled in your UV view.

Having this in mind will allow you to have the exact amount of UV tiles that you need and you’re not going to worry about blurred textures.
2 – ADD SUPPORTING EDGES
Before unwrapping, I would like to point out another important thing I always consider when modeling a hard surface object: I make sure to avoid stretching. The texture will spread around a hard edge if that seam edge isn’t reinforced properly. To prevent this, I add extra support edges around hard edges.
Check the GIF below and see how the edges move if you don’t have any support around them.

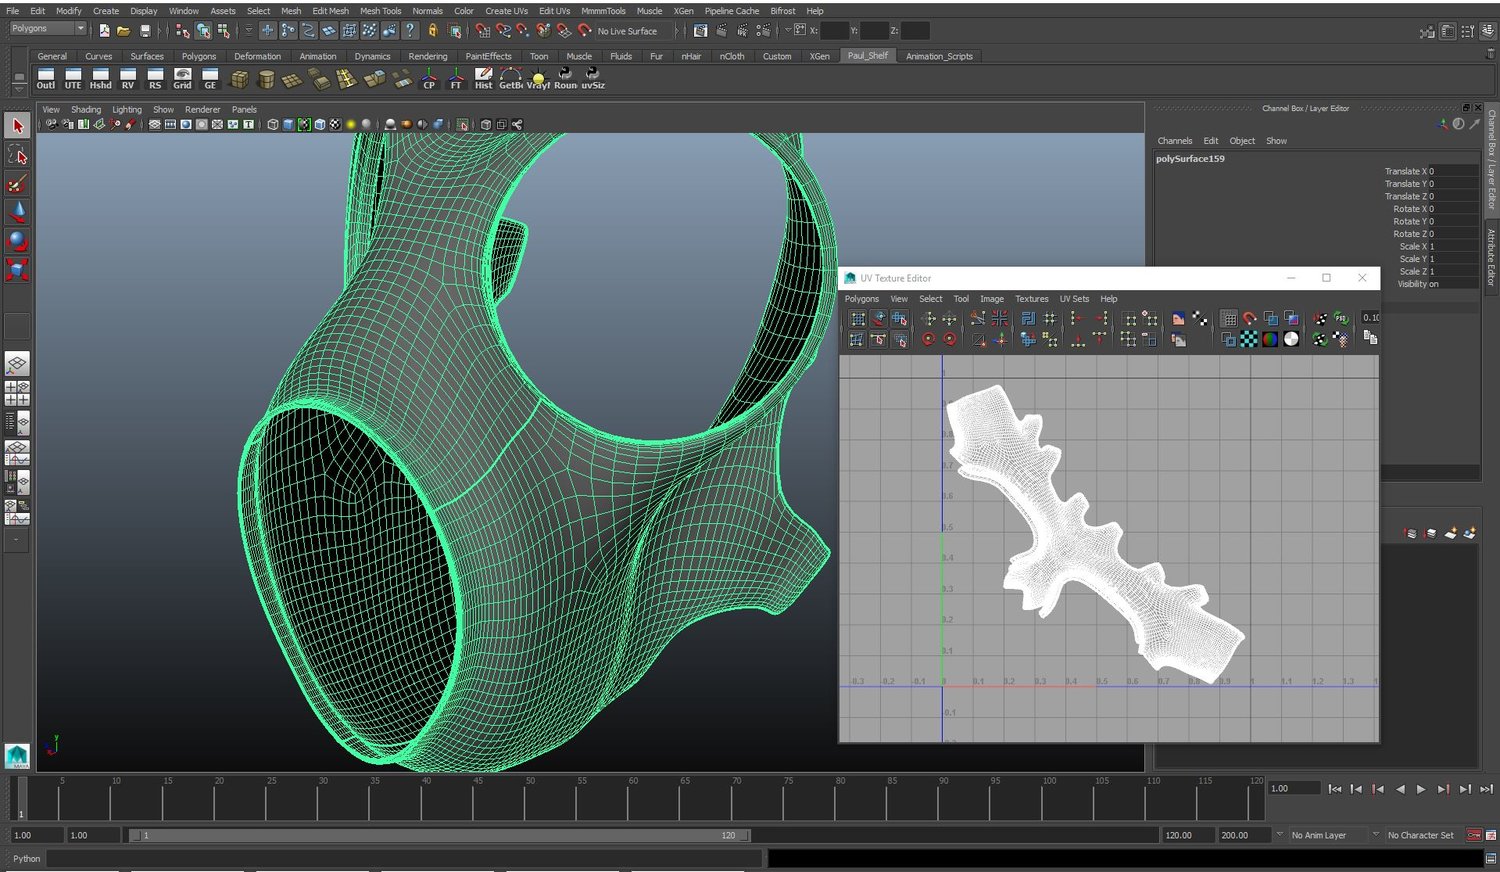
3 – FLATTEN CYLINDERS AND STRIPS
While unwrapping cylinders, strips or ropes, we might get a weird result. This result might affect your textures and also occupy an unnecessary space in your tile. There’s a cool technique native in Maya that might help you making these UV’s straight (see video below). I learned this technique with one of my teachers and now co-worker Matthew Novak (He’s a genius). Or you can use a software like UVLayout as well (which is awesome, btw)
Having flattened UV shells will also benefit if you have any text or logo applied.
4 – KEEP YOUR UV’S UNIFORM
Keeping your UV’s with a consistent scale is crucial to avoid any discrepancy later on with your texture resolution. The best way to check if they have the correct size is to use a UV checker. You can find fancy checkers online, but I think that they end up being too distracting, so I prefer using something simple like this one.
I would like to share with you this excellent script for Maya which allows you to match the size of your tiles automatically. I found this treasure after I spent almost two weeks organizing and scaling my UV’s, one by one, for my Gas Mask project. Yeah…At least I learned something: “Always be lazy and search for cool scripts before you start a tedious task!”
Having UV’s with the same scale necessary, okay, we already know that, but there are a few exceptions which are acceptable to have multiple resolutions in the same object.
Sometimes there are parts which are going to be closer to the camera than others, and you don’t want to have unnecessary tiles, so it’s all about yours or your lead’s judgment. But even if you have different sizes, I would recommend scaling them proportionally (ex: ½, ¼, etc.). This way it’ll be easier for you to scale up later if you need.
Another two exceptions to that rule you can see on my gas mask project. I had to have my cloth UV’s with a different size because I had cut the seams based on the actual reference and the UV tile was too large to fit a 4K square. So I kept it’s size and double the resolution in MARI. I also scaled up tiny pieces (rivets, etc.) so they could have more resolution.
5 – MAKING GOOD CUTS AND AVOIDING VISIBLE SEAMS (IF YOU CAN)
Thankfully we live in a new era where we don’t have to worry about UV seams anymore, but that doesn’t mean that you have to be irresponsible with your cuts. Even though in some cases you need to cut it more to get more resolution (remember step one?), you must pay attention and avoid unnecessary visible seams.

Another thing to keep in mind while making your cuts is to avoid selecting edges that end in a 5 pole, which may cause distortion.
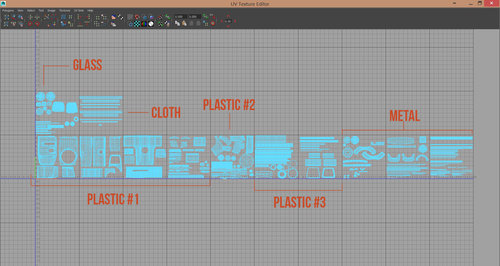
6 – SEPARATE TILES BY MATERIALS AND ORGANIZE
This step is a personal choice, but it helps me a lot when I’m working in MARI. By separating tiles by materials, you’ll save a lot of time with selections down the road. Here’s an example of the UV’s for my Gas Mask Project and my Canon Reflex Zoom:

Having said that, sometimes we end up having tiny pieces with different materials which don’t have the necessity to stay in its tile. So it is up to you to judge where you should put it. Just make sure to avoid putting it too close to other UV shells, this will make it easier for you to select it later.
If you read my article about organization, you might know how much I care about it. And when it comes to UV’s, this step is extra important. Not only you should separate them by materials, but it is also a good idea to find your way to laying it out in a smart way, making good use of the UV space you have, avoid empty spaces if you can. This is not a rule, but please consider making your UV’s look good. Some people will sincerely appreciate that (I am included :P)
FINAL THOUGHTS
I hope you found this article useful. I know that UV’s can be boring, but be mindful and remember that you’re going to be working on a team and it is essential to make things proper for other artists.
Website: http://www.paulhpaulino.com/
Facebook: https://www.facebook.com/paulhpaulino
Artstation: https://www.artstation.com/artist/paulhpaulino/profile